
Jotform Integration Guide
Connect your Jotform account to CertFusion and automate certificate delivery for your form submissions. This guide walks you through connecting the integration, setting up webhooks, and managing automated certificate distribution.
1. How to Connect Your Jotform Account
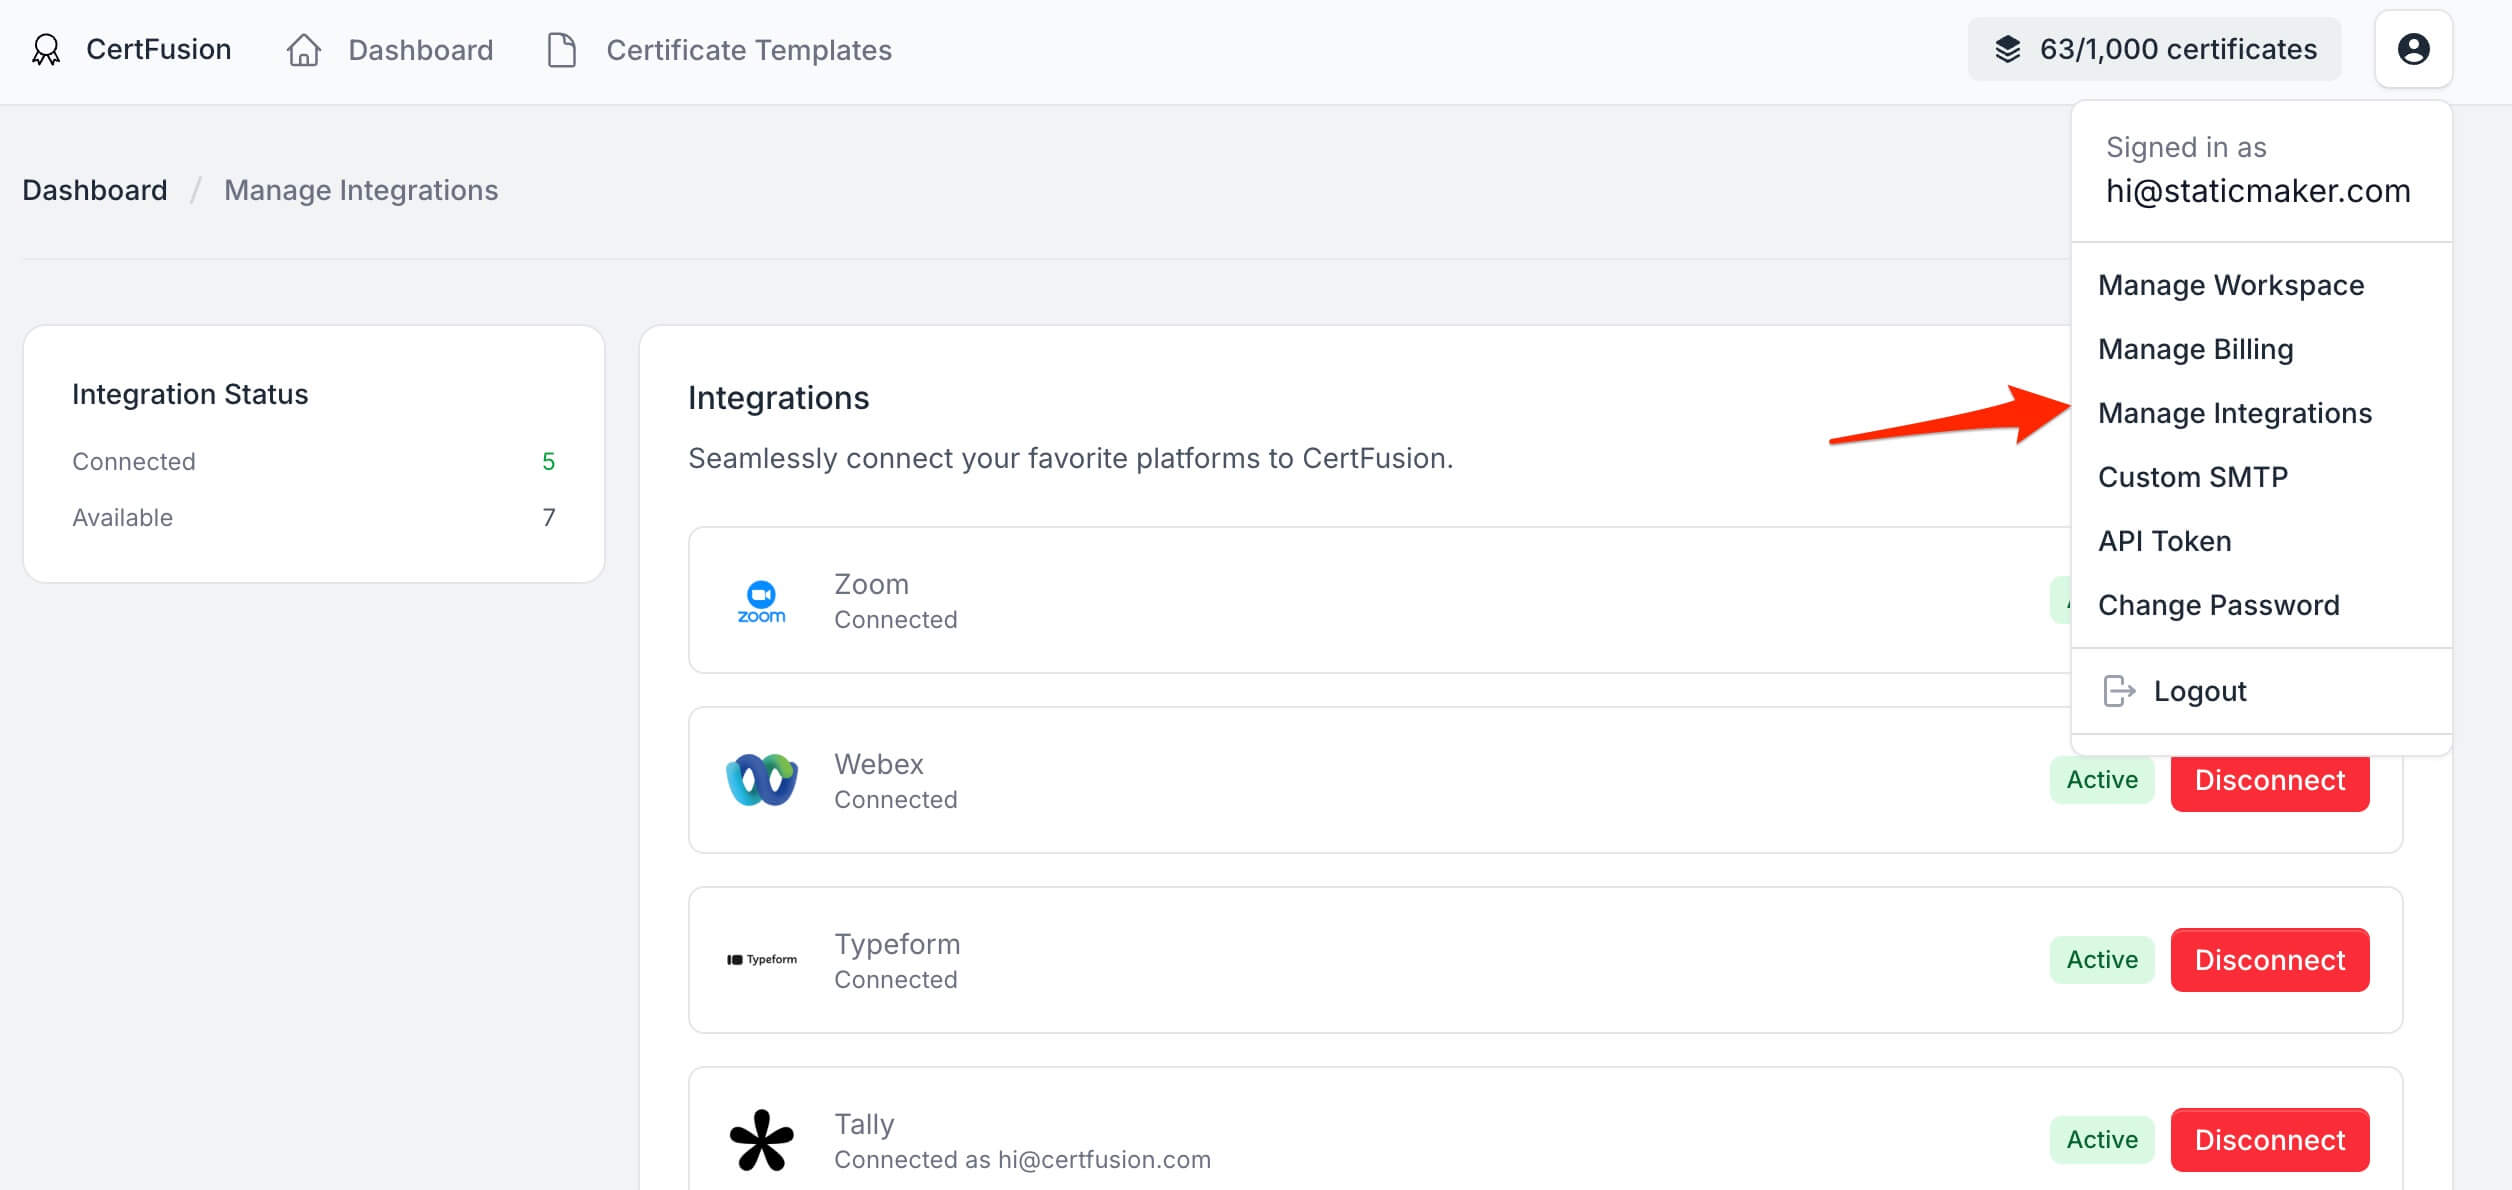
- Navigate to the Manage Integrations page in your CertFusion dashboard.
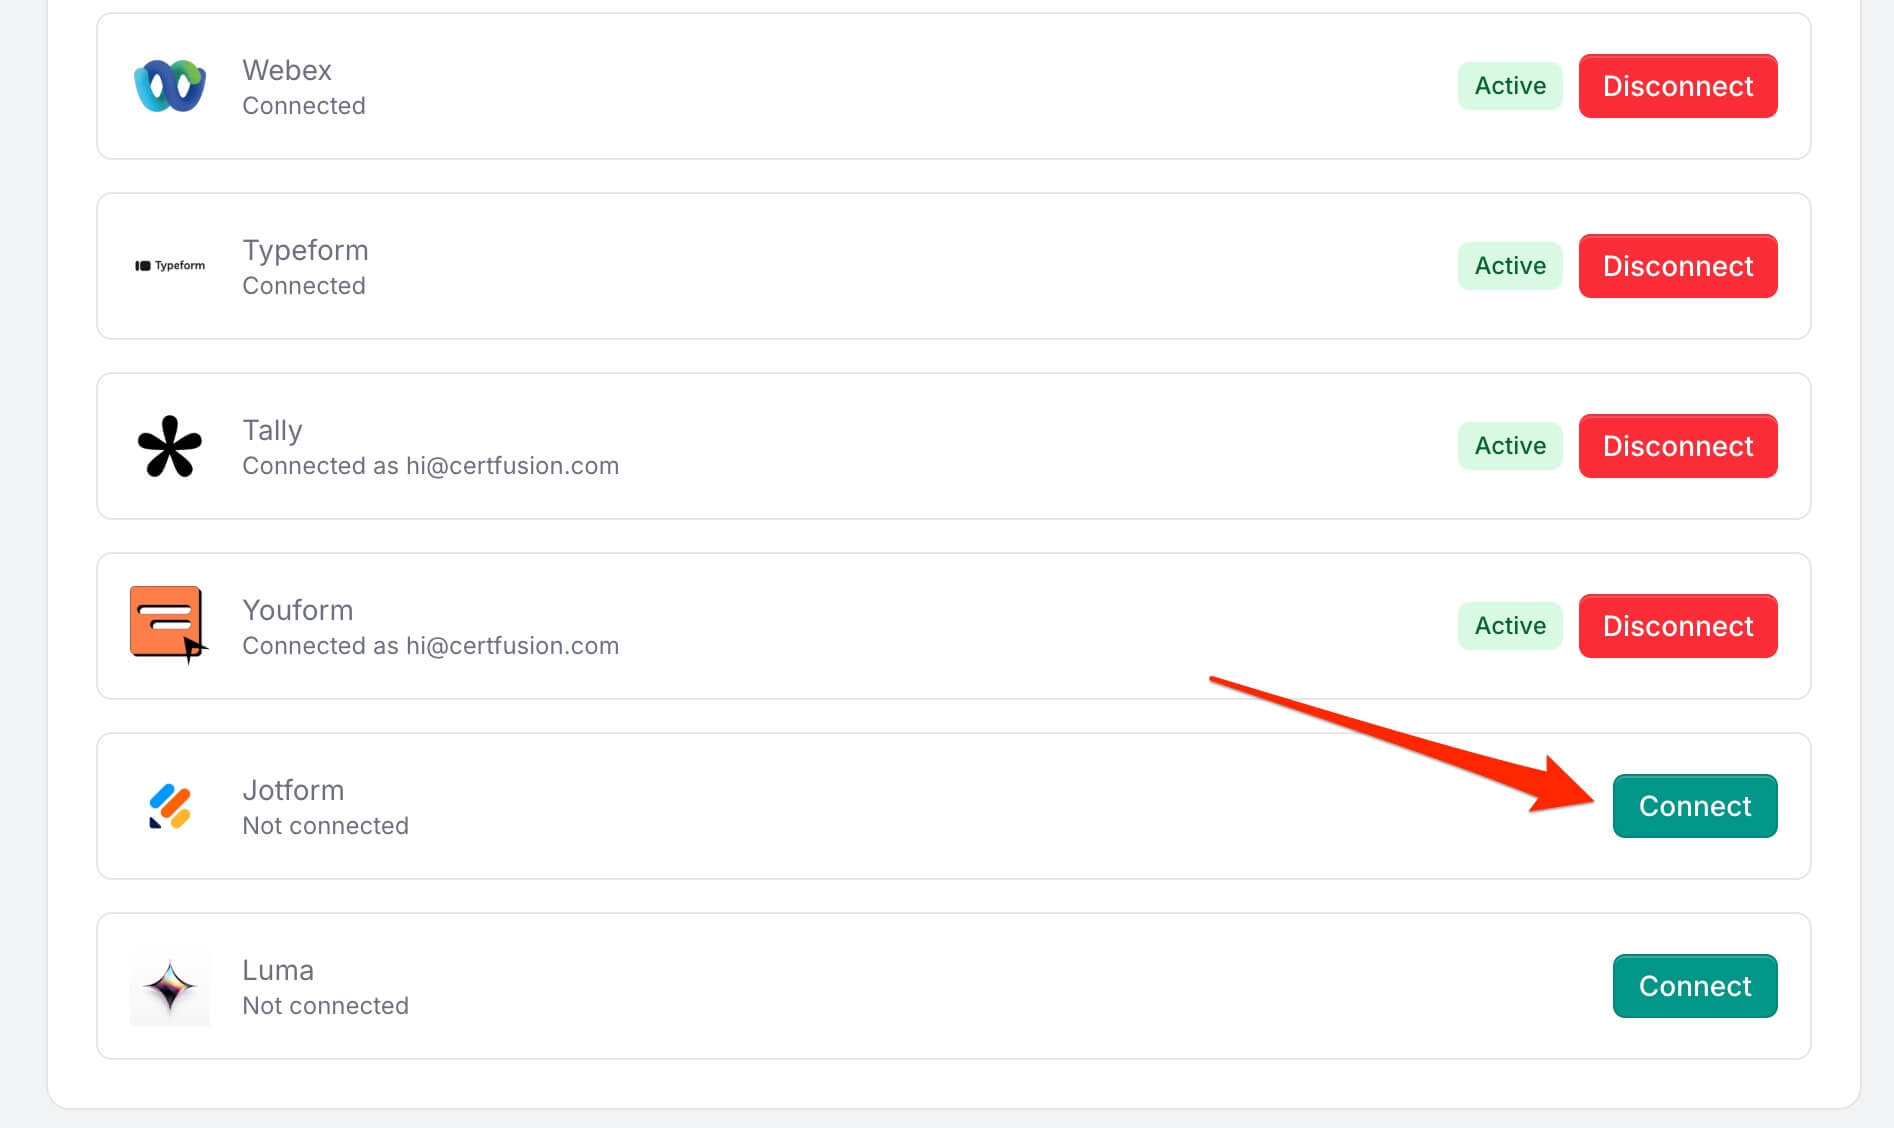
- Click Connect next to Jotform in the integrations list.
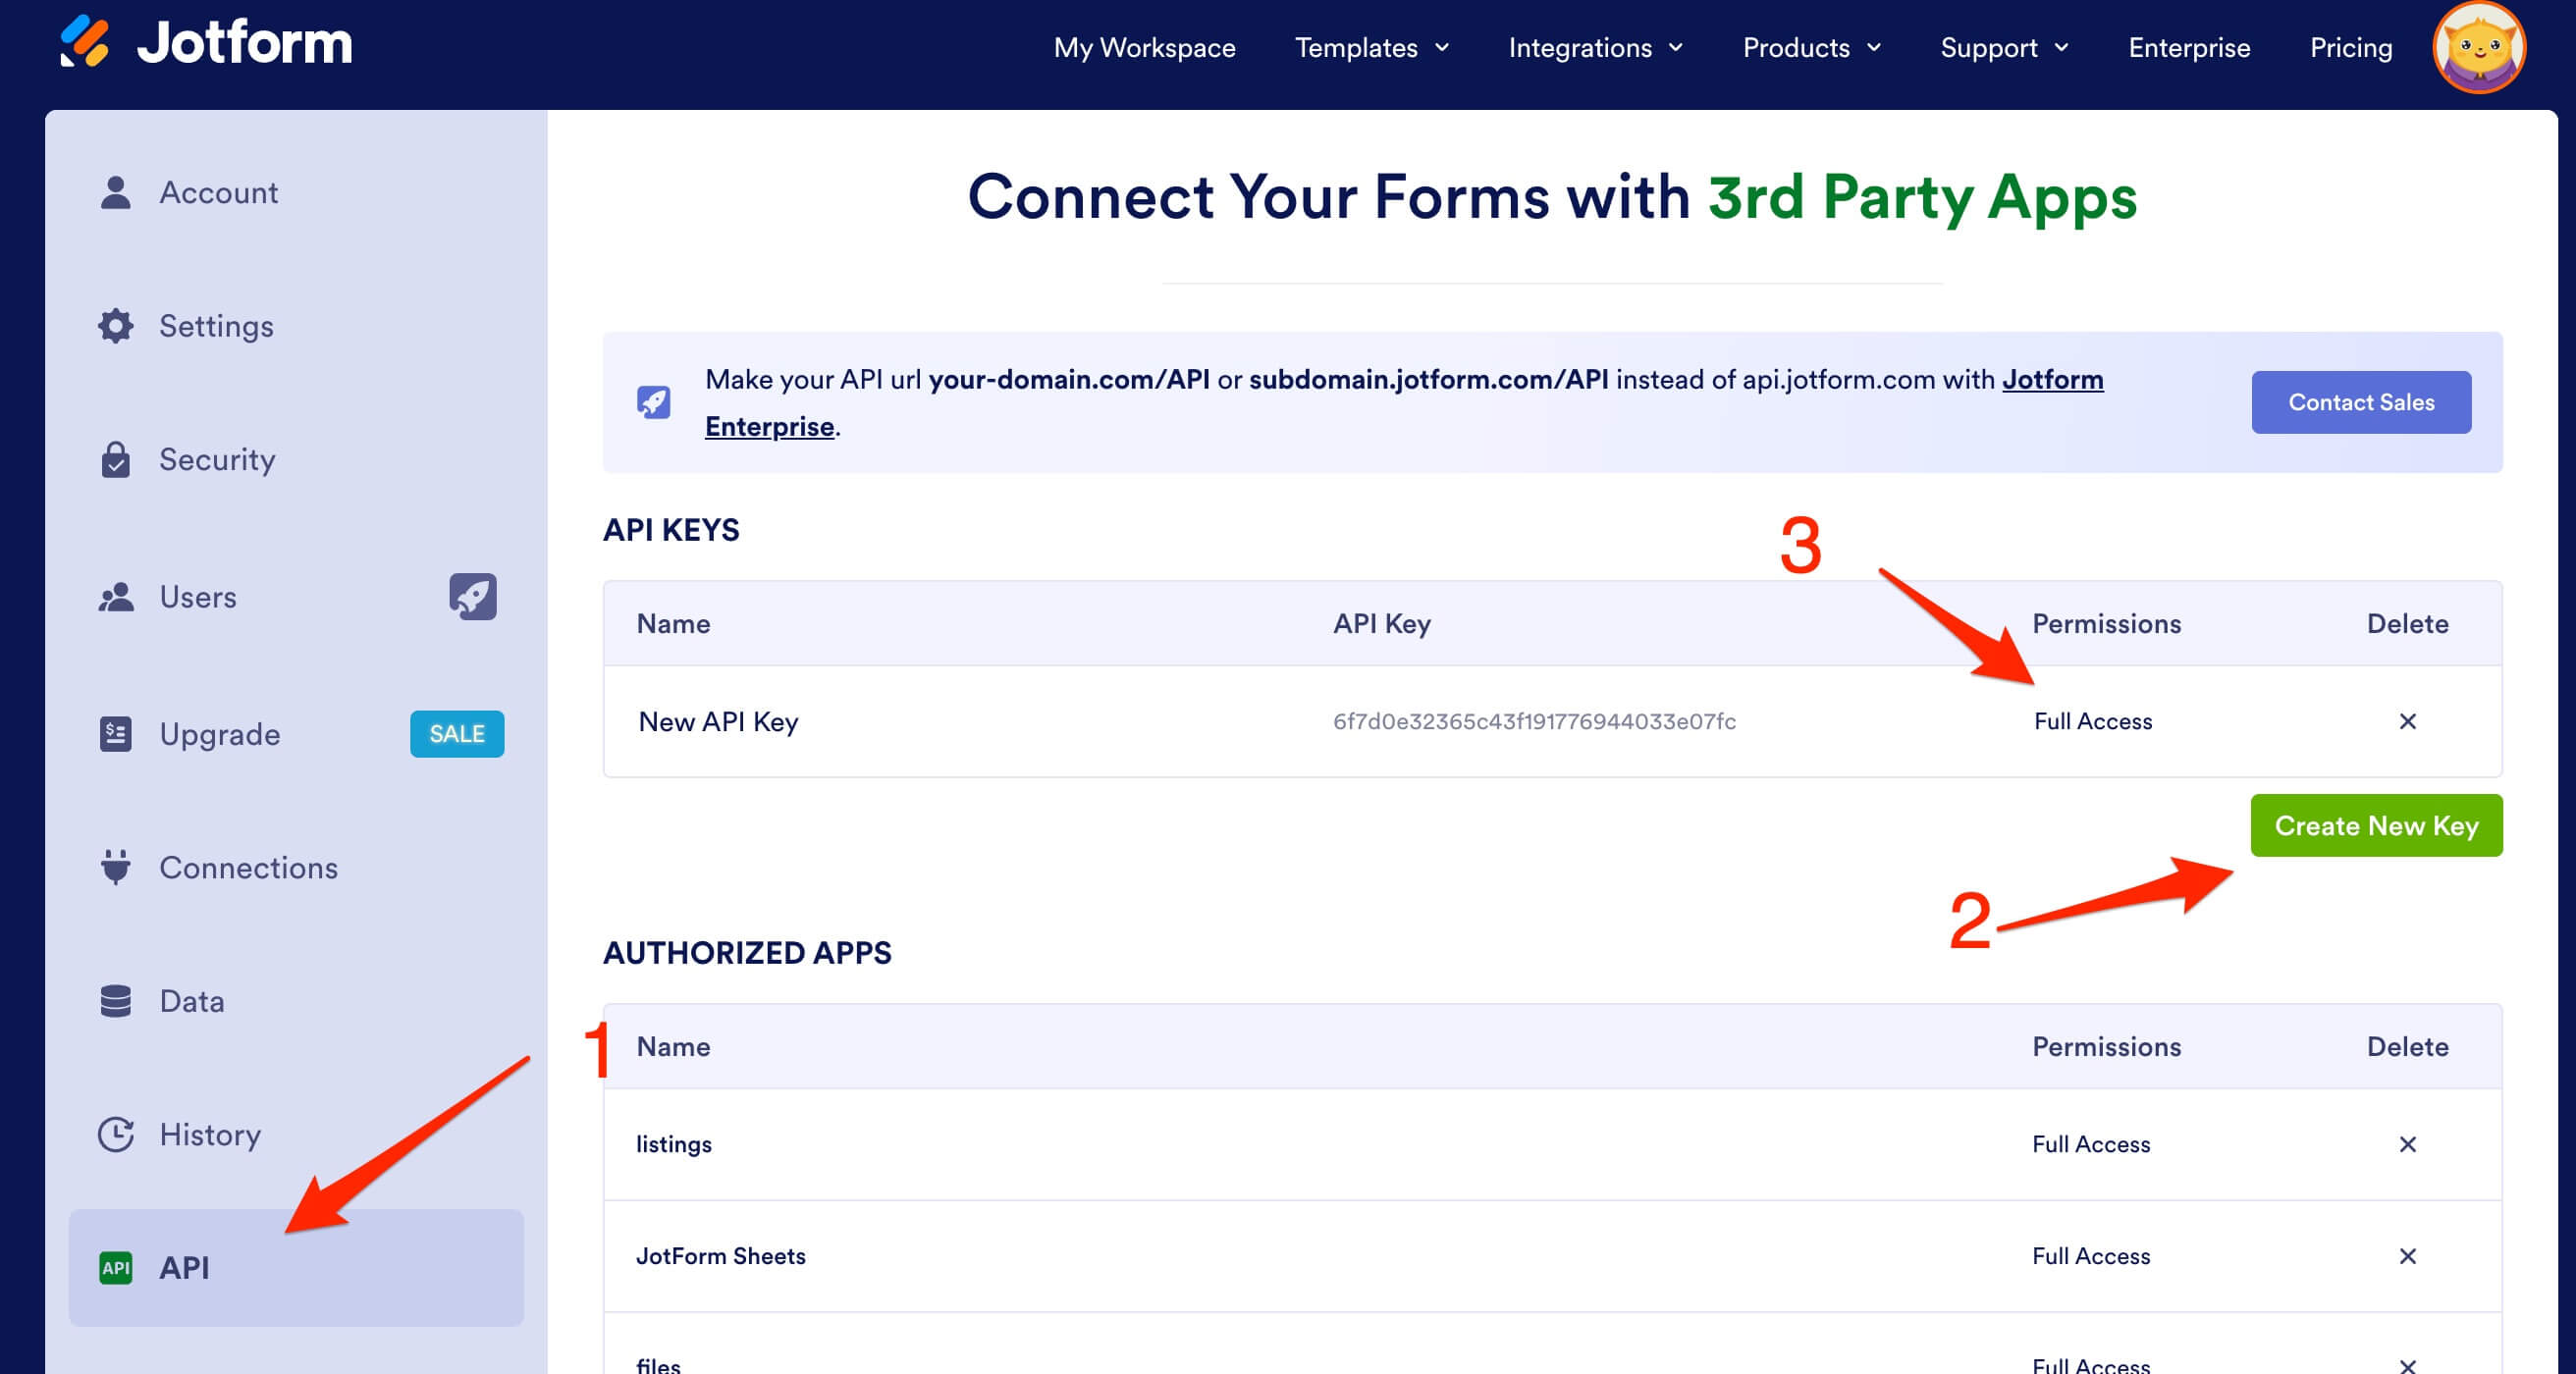
- Create a full-access API key in your Jotform API Settings (Settings → API → Create New Key), then
paste it into the modal that appears. Standard, EU, and HIPAA accounts are all supported —
CertFusion detects your account's region automatically.
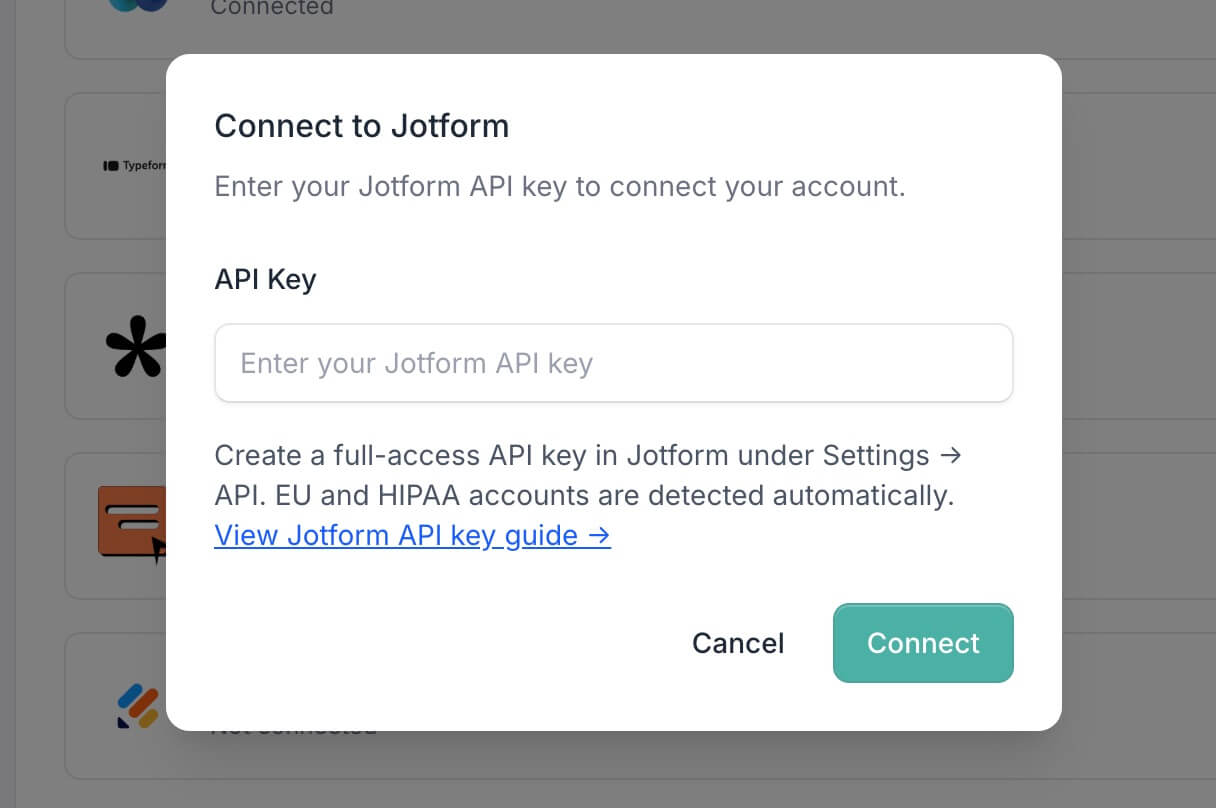
- Click Connect to validate and save your key. CertFusion verifies it against
Jotform and shows a success message once connected.

CertFusion only accesses the form structure and response data required for certificate generation. Your API key is securely encrypted and stored.
2. How to Set Up Automatic Certificate Generation
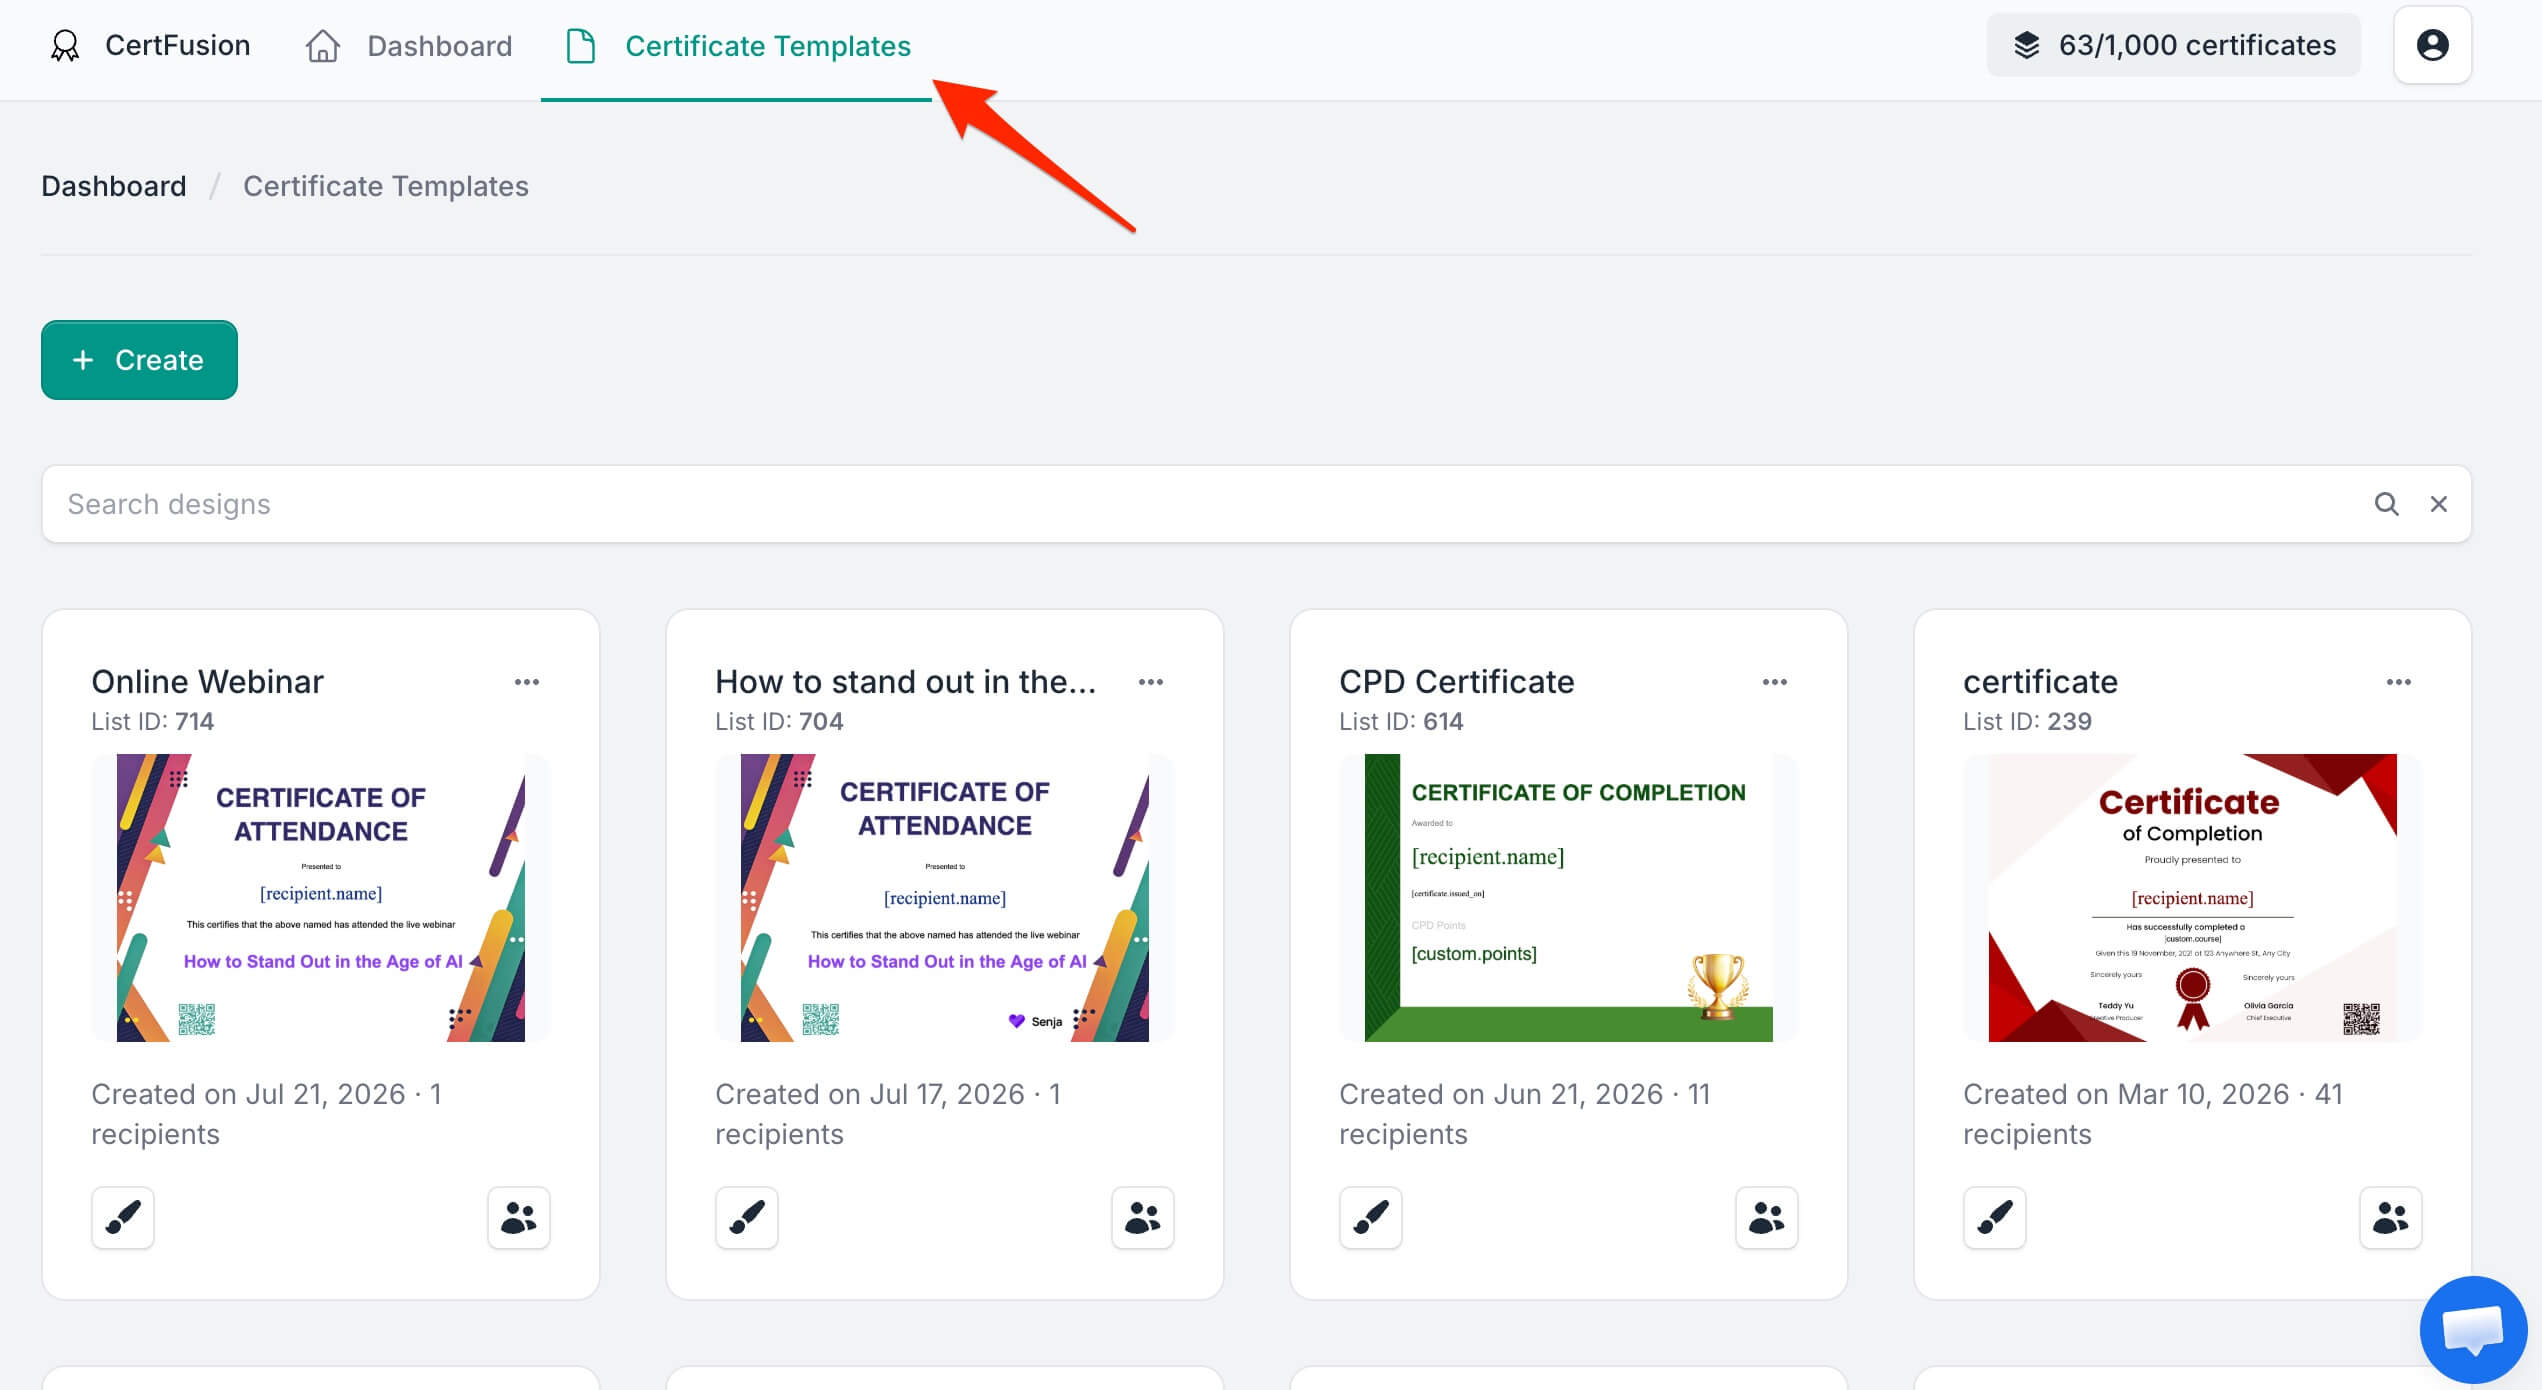
- Go to your Certificate Templates dashboard on CertFusion.
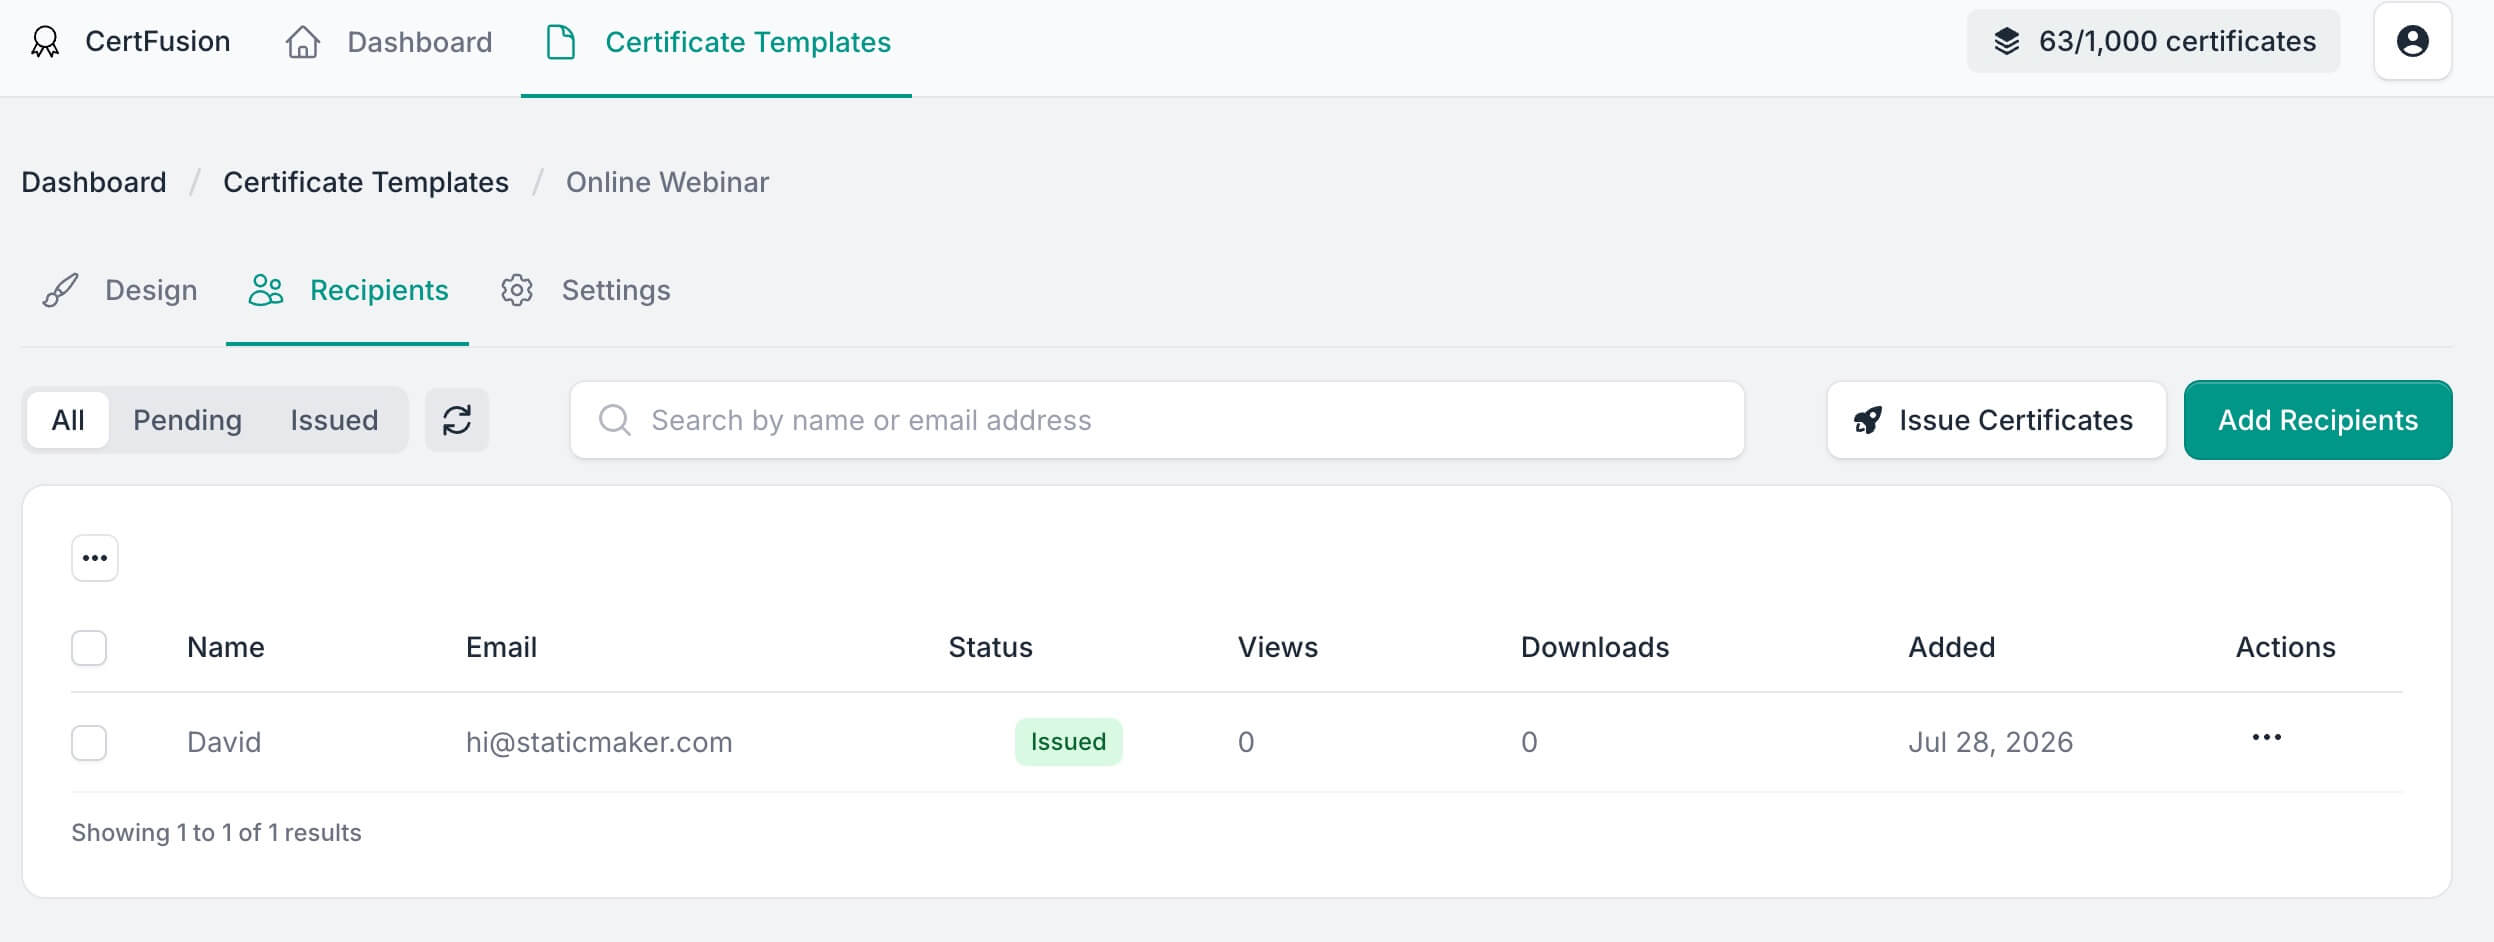
- Open the Recipients section of the template you want to connect to Jotform.
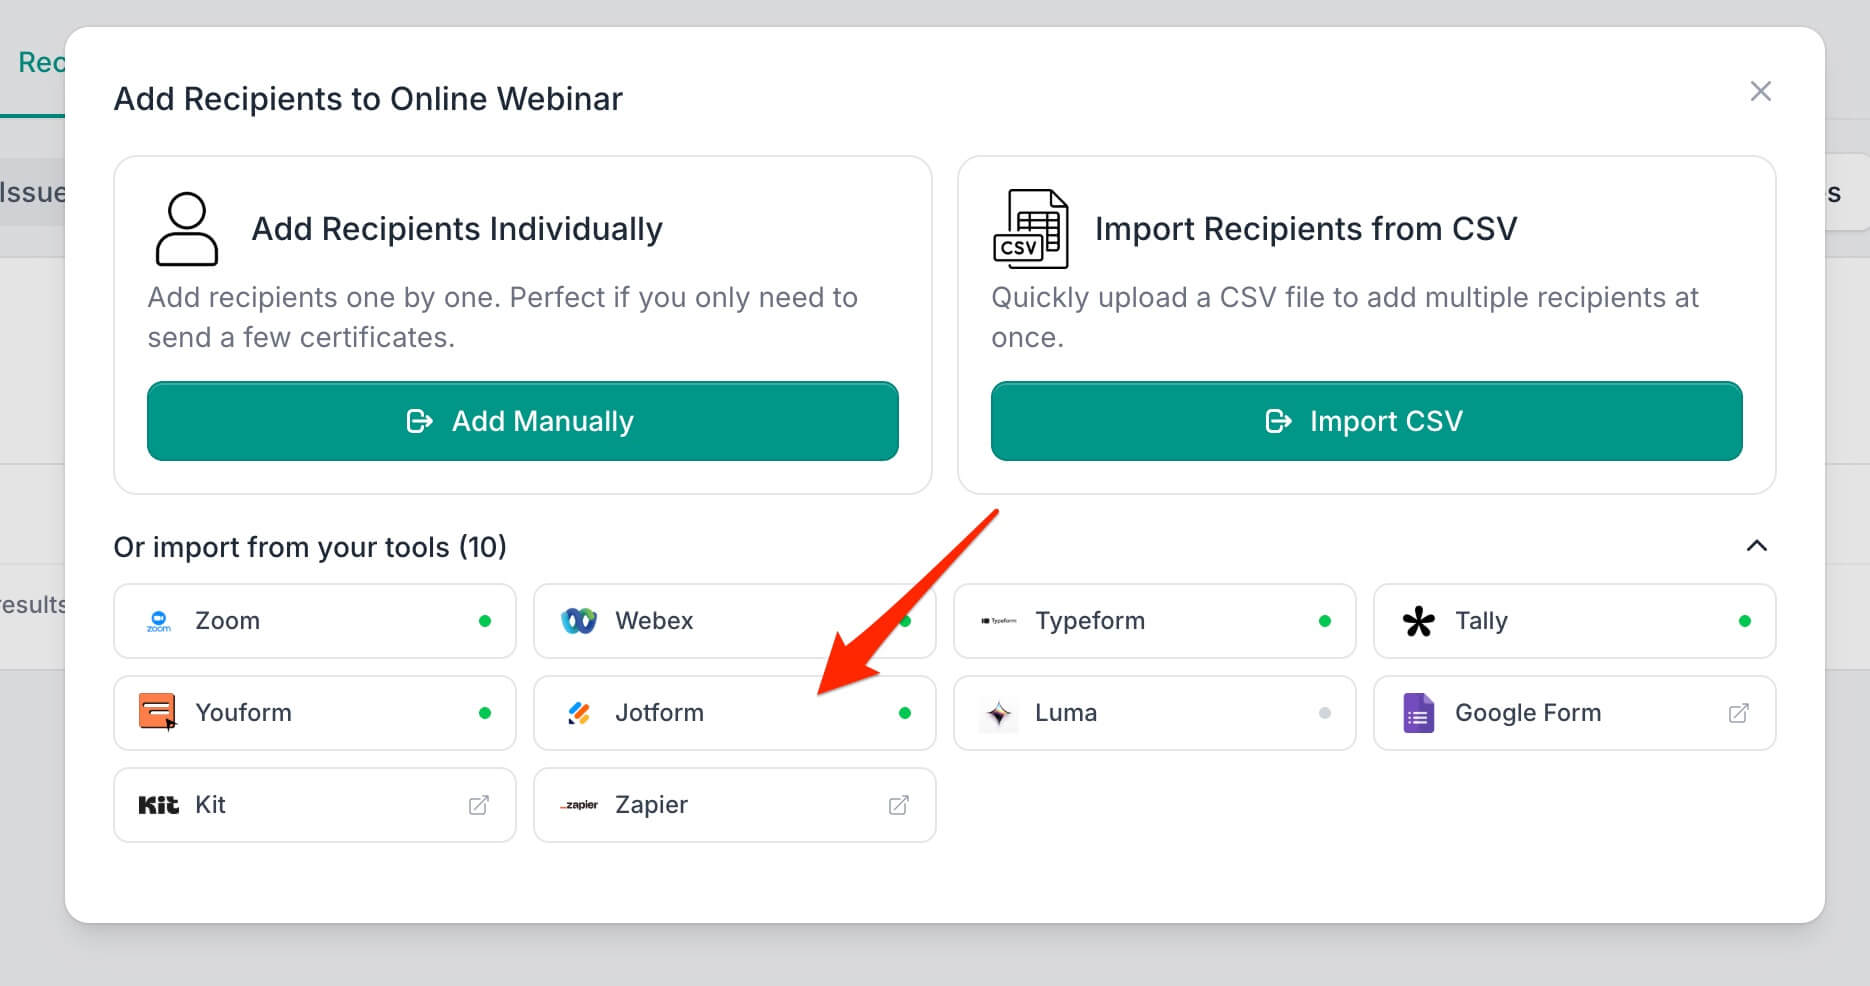
- Click Add Recipients and select Jotform from the
"import from your tools" list.
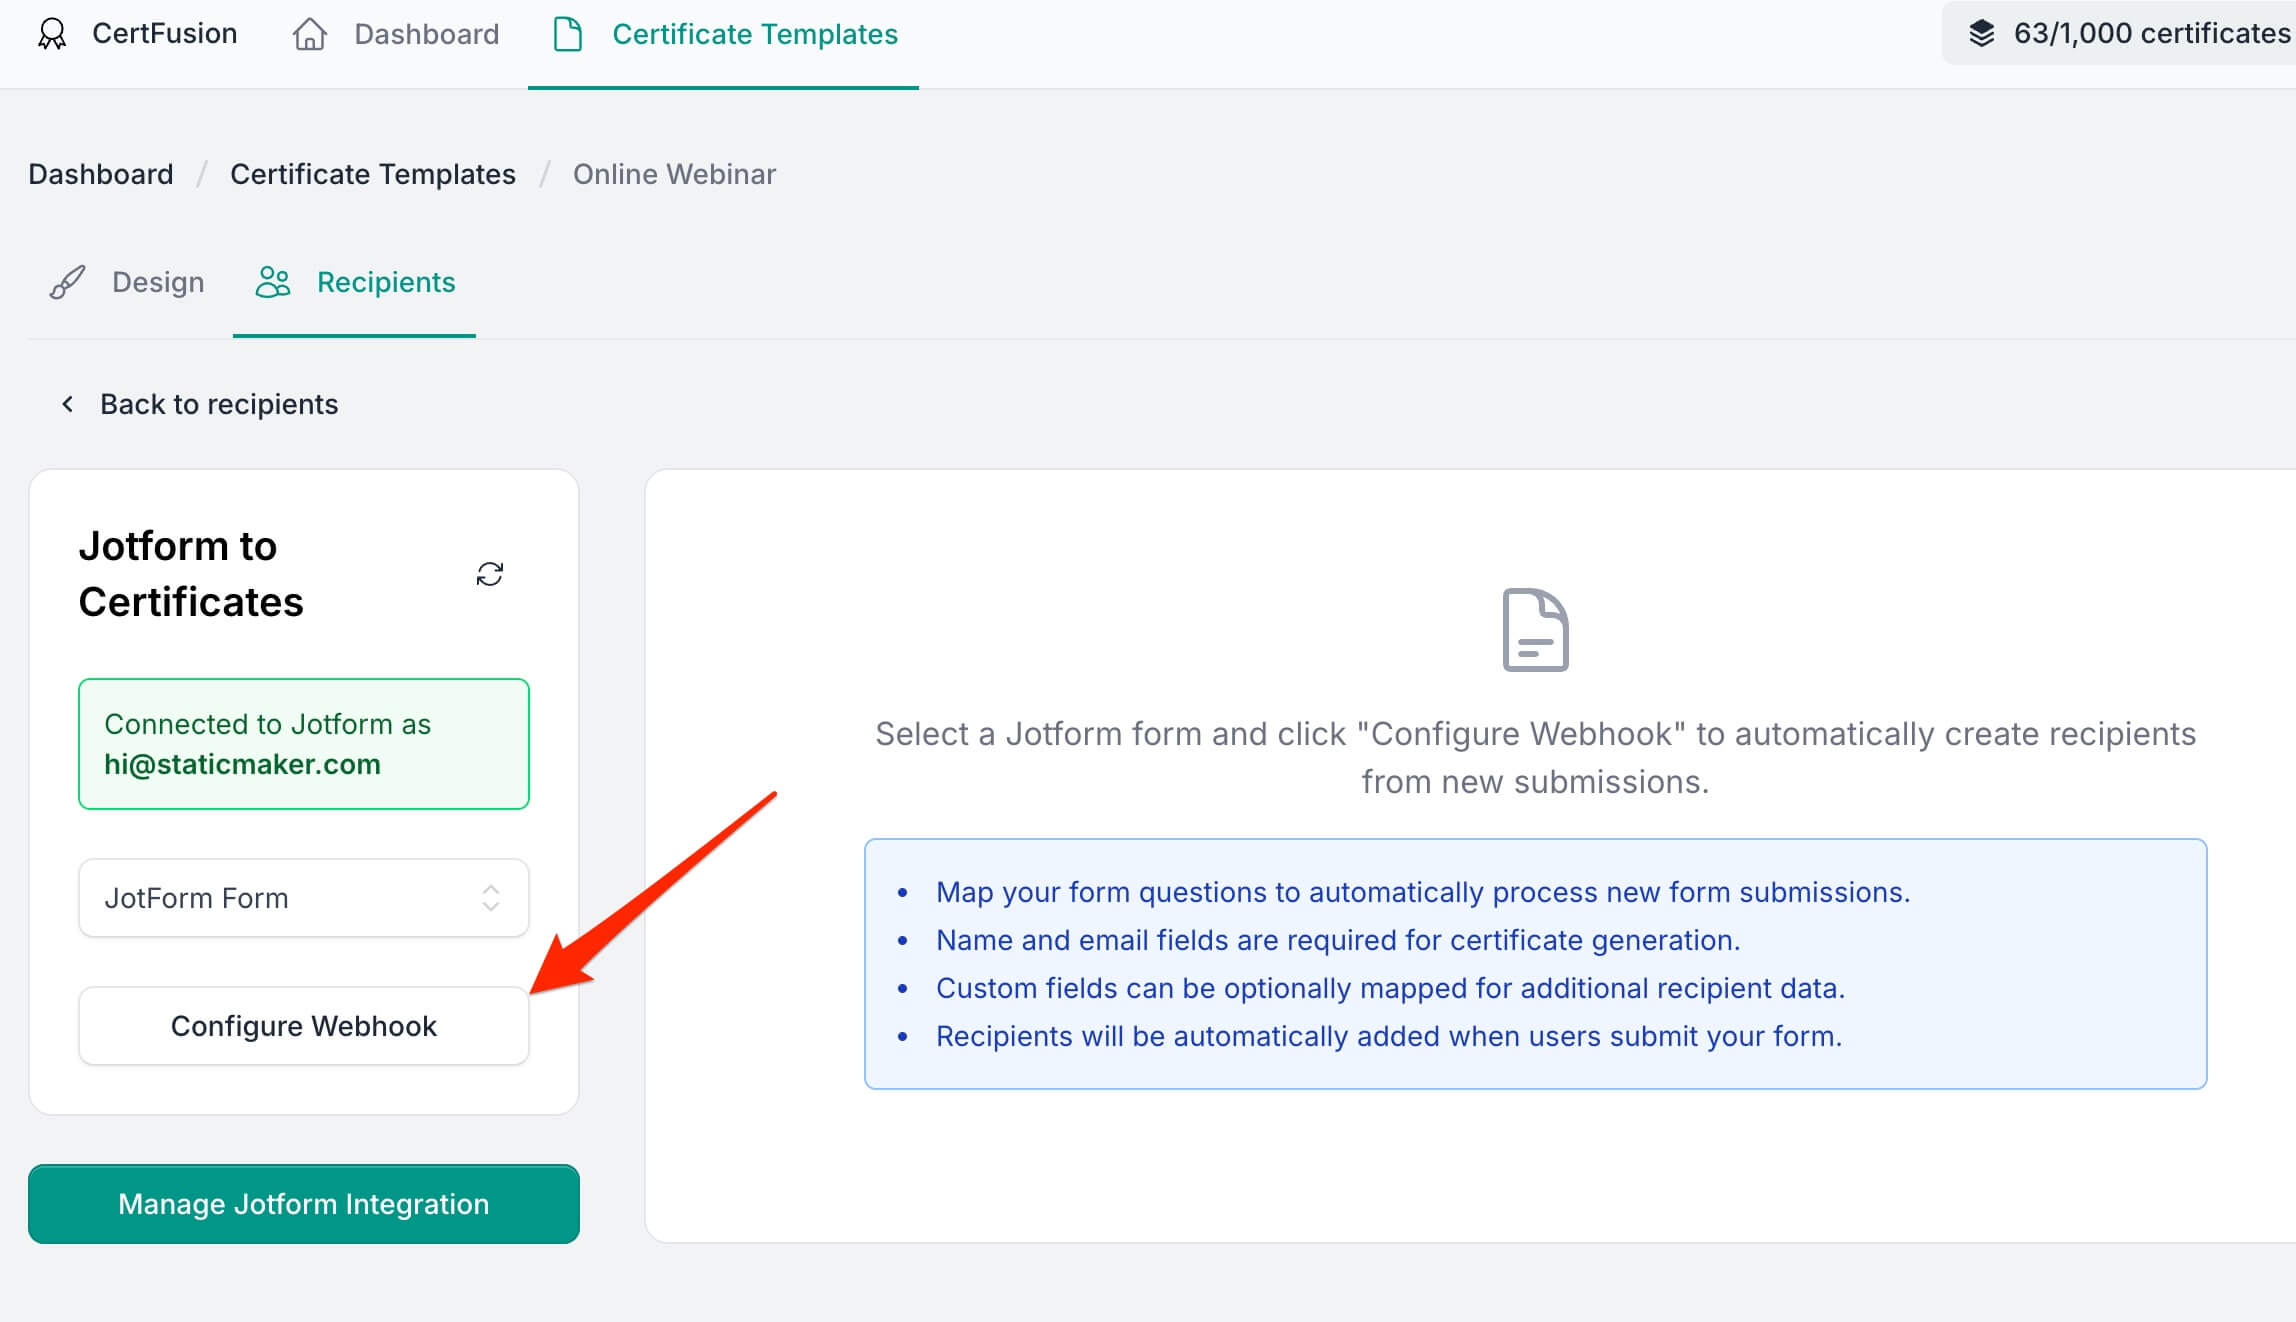
- Select the form you want to connect from your Jotform forms list.
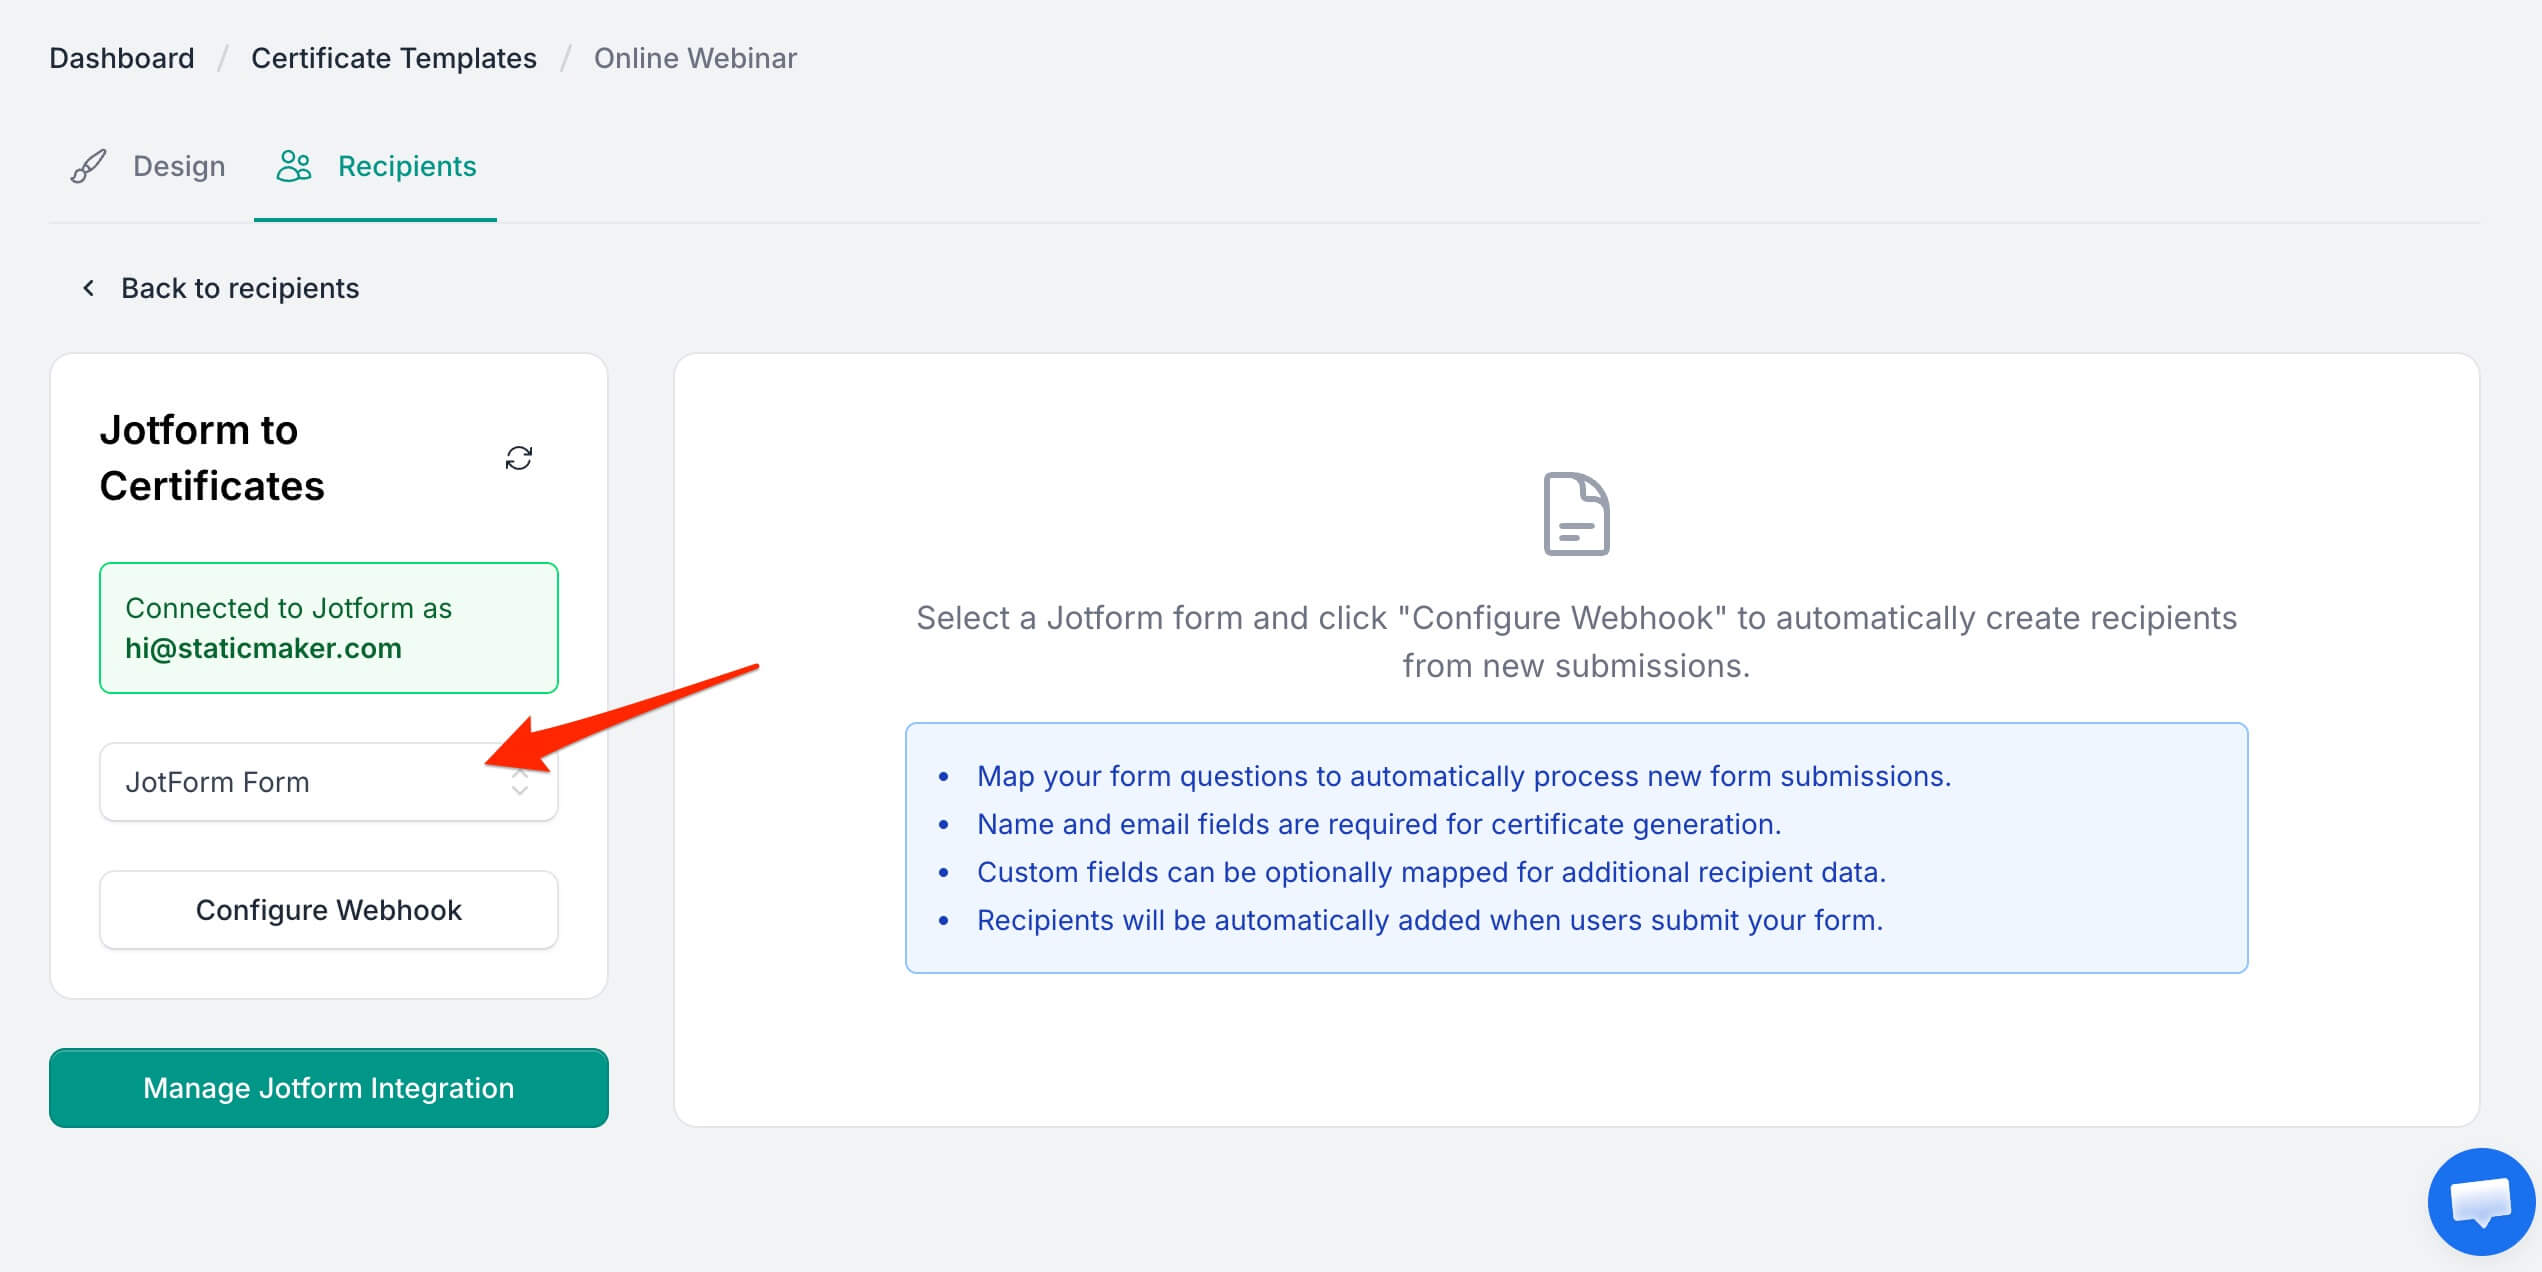
- Click Configure Webhook to load the form's fields and set up mapping.
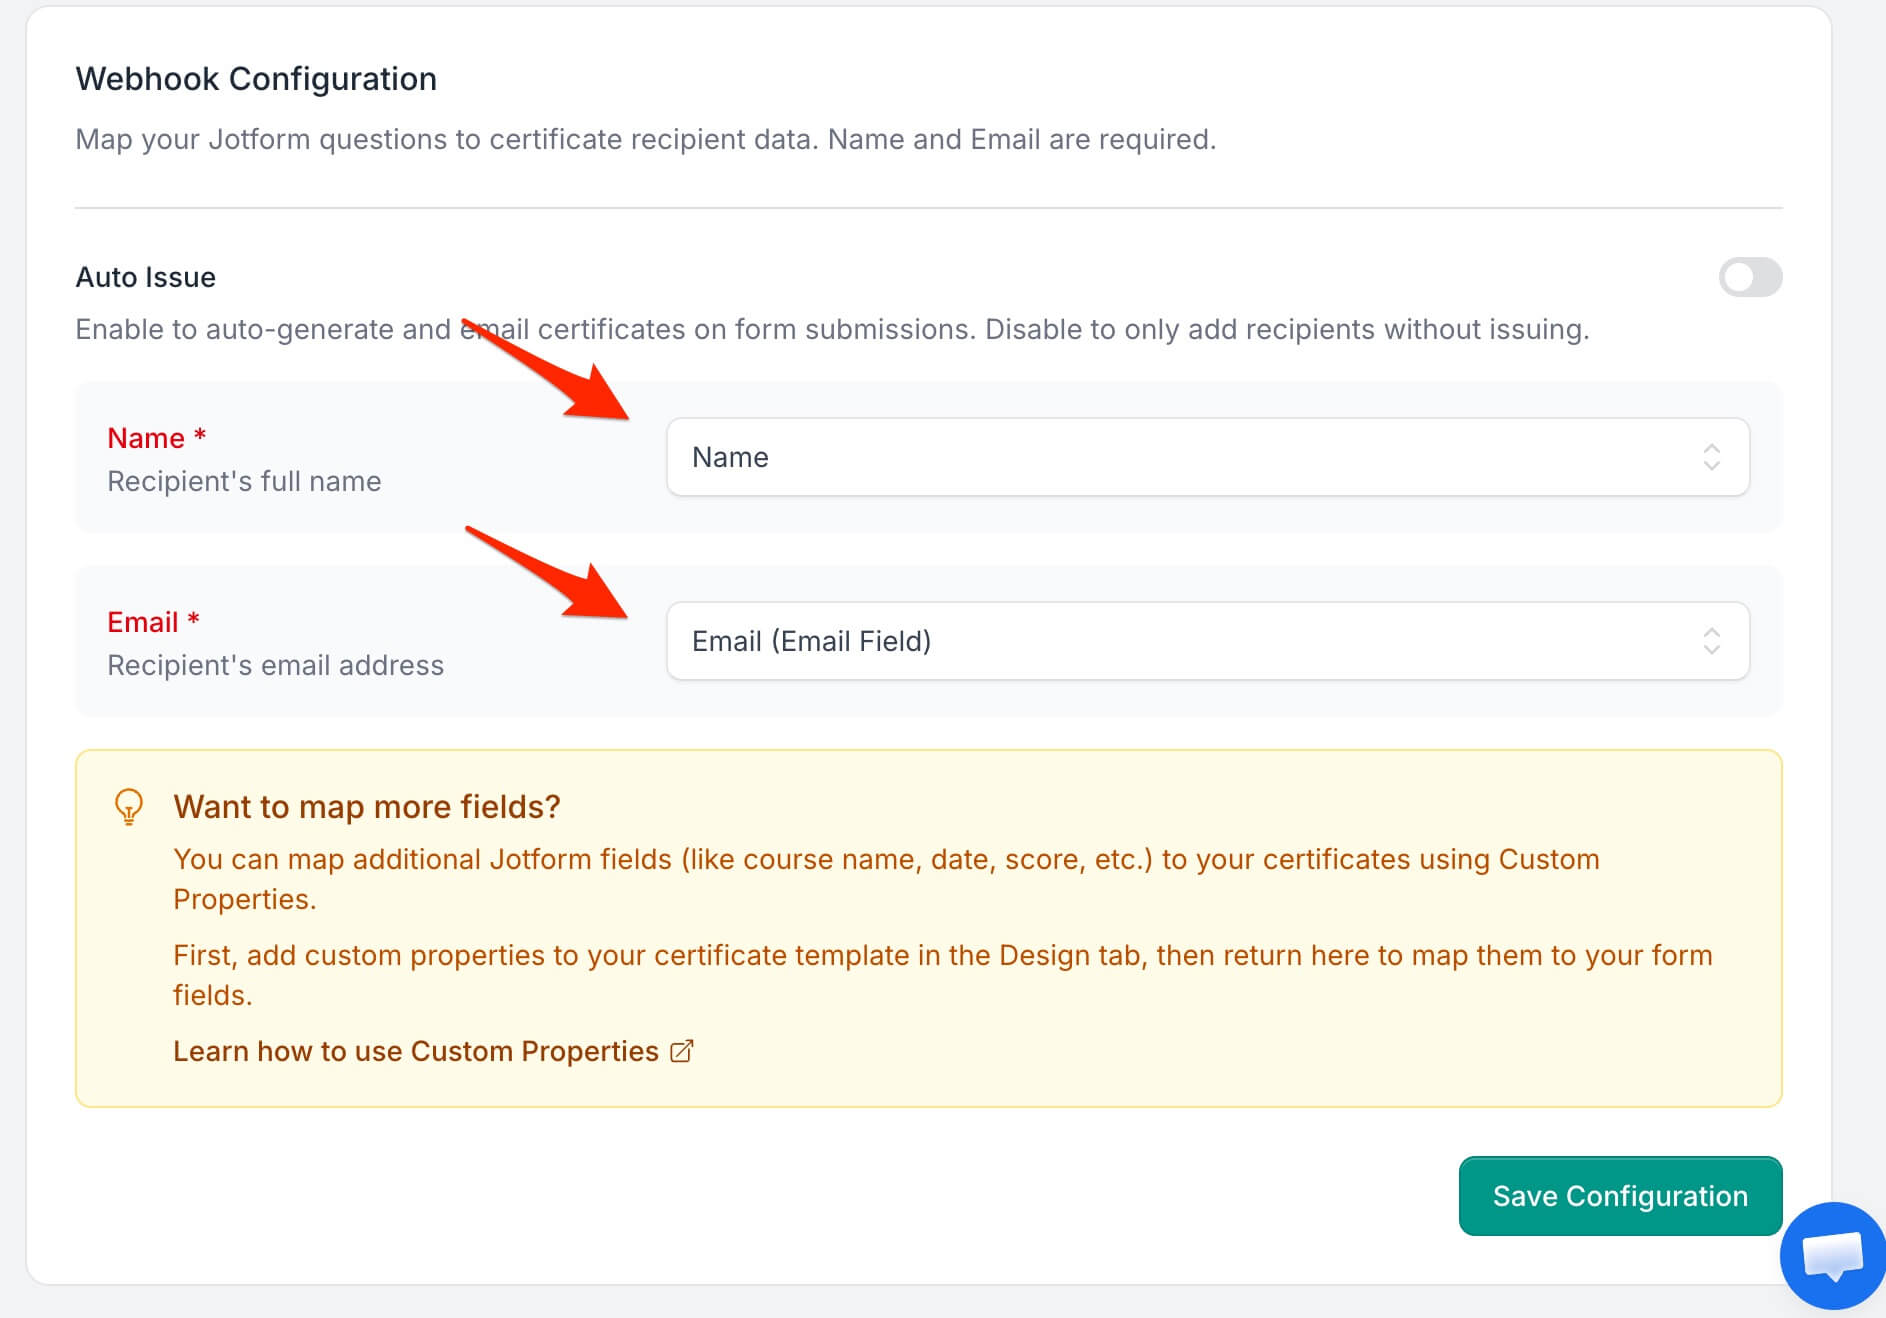
- Map your form questions to certificate recipient data using the dropdowns:
- Name (Required): choose the form question that holds the recipient's name
- Email (Required): choose the question that holds the recipient's email address
- Custom Fields (Optional): map any custom properties from your certificate design
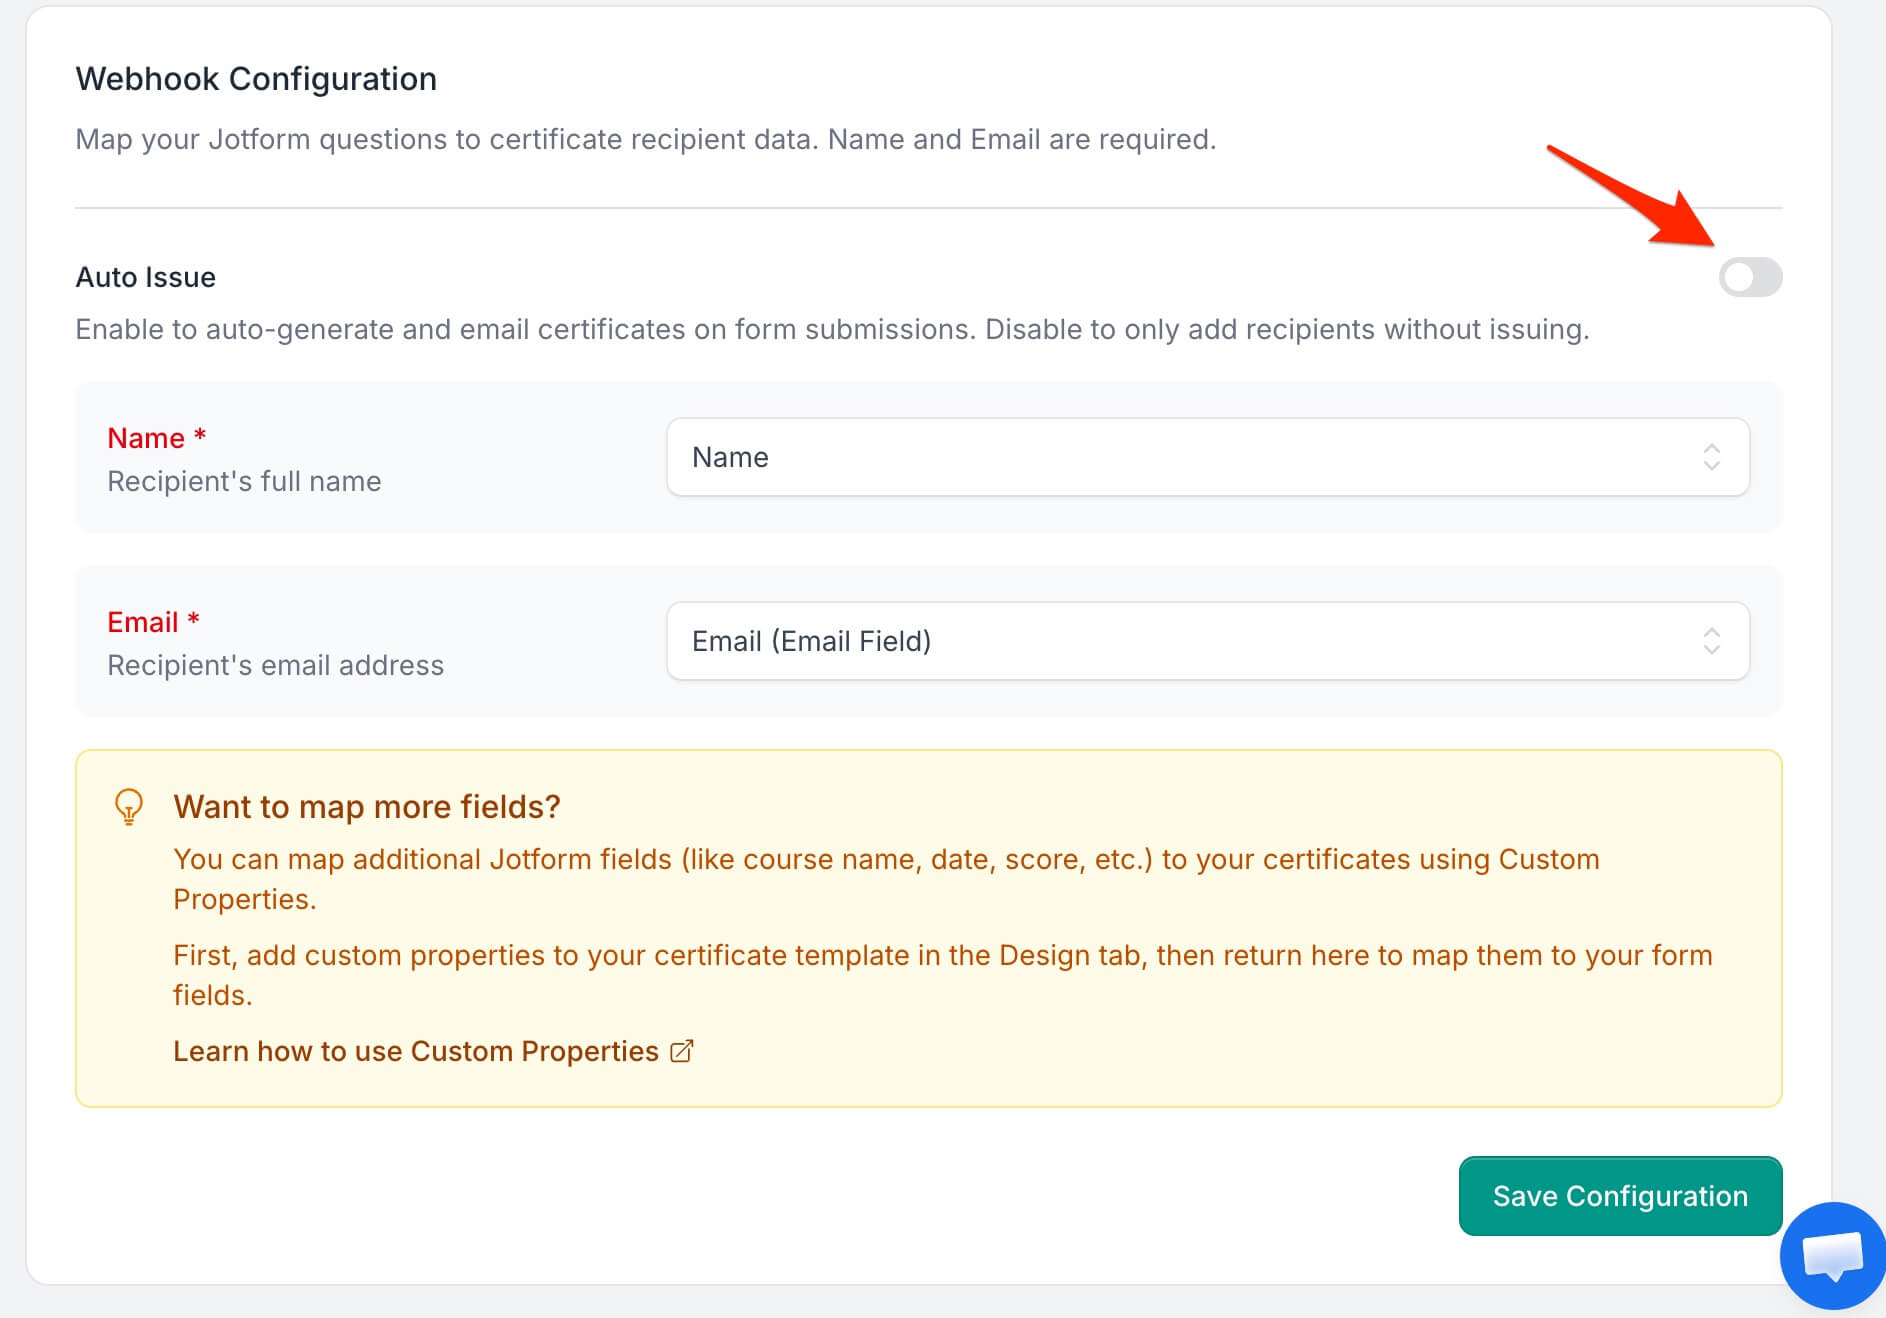
- Choose whether to enable Auto Issue – this will automatically generate and
email certificates when forms are submitted. Leave it off to only add recipients without
issuing.
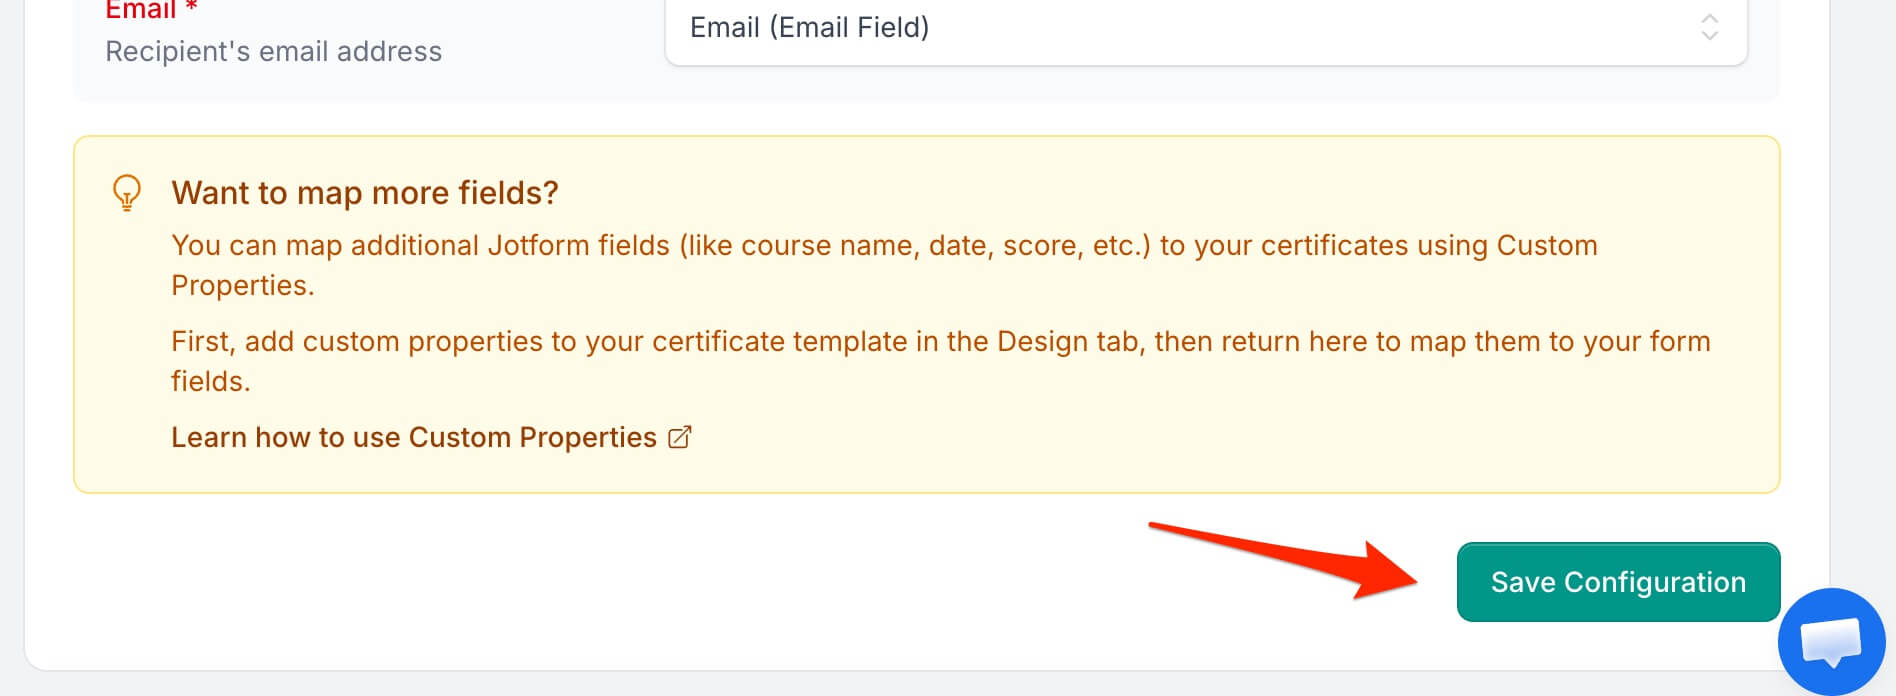
- Click Save Configuration to register the webhook on Jotform and activate it.
Once configured, new form submissions are sent to CertFusion automatically and create certificate recipients. If auto-issue is enabled, certificates are generated and emailed immediately.
3. Managing Your Jotform Integration
Viewing Webhook Status
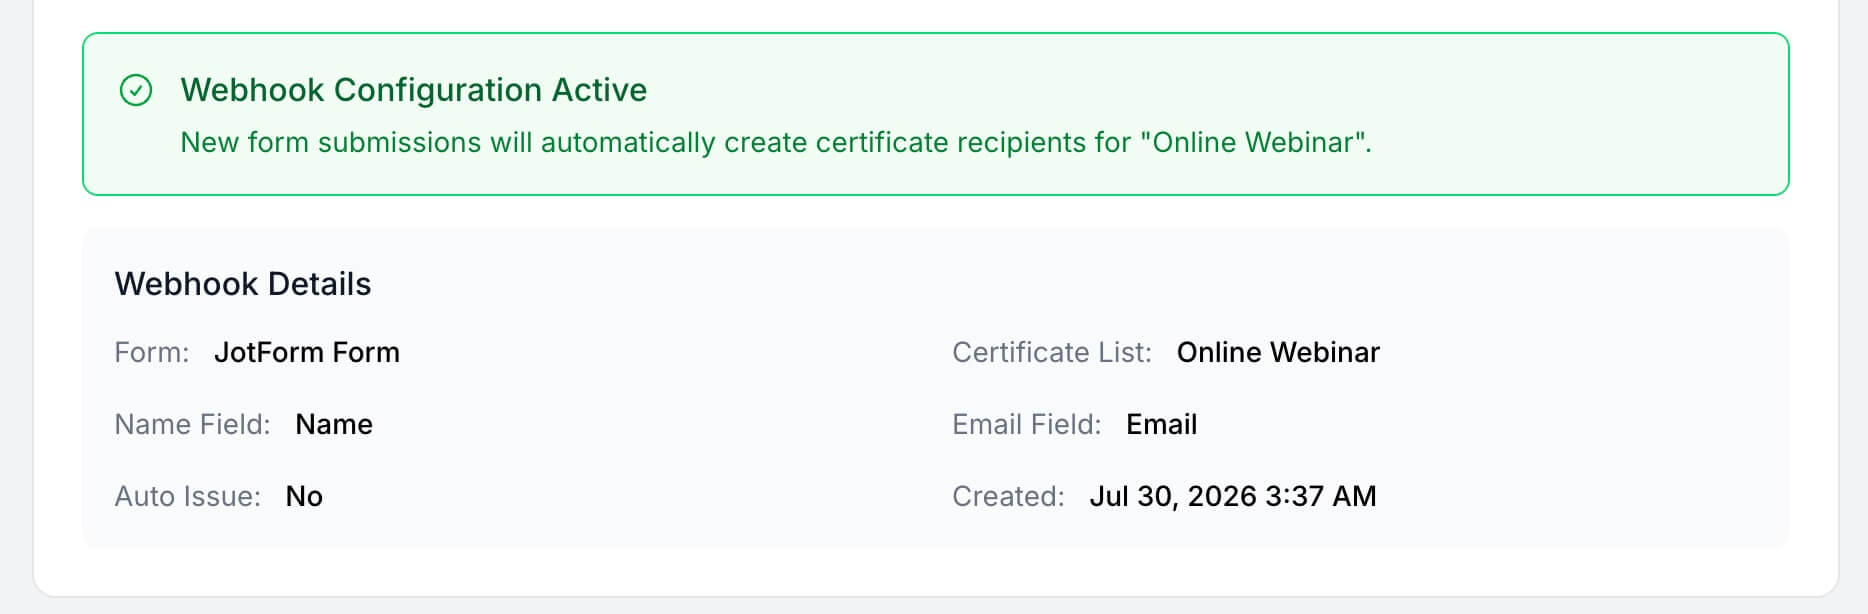
You can view the status of your webhook configuration in the Recipients section. An active configuration shows:
- Connected form name
- Field mappings
- Auto-issue status
- Configuration date
Updating Configuration
To modify your webhook settings:
- Return to the Jotform integration page for your certificate template
- Make your changes to field mappings or the auto-issue setting
- Click Update Configuration to save changes
Removing Webhooks
To stop automatic certificate generation:
- Go to the webhook configuration screen
- Click Remove Configuration to delete the webhook
- This stops processing new form submissions but won't affect existing recipients
4. How to Disconnect Your Jotform Account
- In CertFusion, go to Manage Integrations and click the Disconnect button next to Jotform. This immediately removes your stored API key.
- You can also delete the API key directly in your Jotform API settings if needed.
Disconnecting stops all webhook processing, but existing recipients and certificates remain intact. You can reconnect at any time by following the connection steps above.
5. Troubleshooting
Connection Issues
- Verify your API key is correct and was copied in full from your Jotform API settings
- Make sure the key has Full Access permissions – read-only keys cannot register webhooks
- Ensure the key hasn't been deleted or regenerated in Jotform
- EU and HIPAA accounts are detected automatically, but the key must belong to the account that owns the forms
Webhook Not Triggering
- Verify your form is published and accepting responses (Jotform sends webhooks for completed submissions only)
- Check that the required Name and Email questions are properly mapped
- Re-save the configuration if you changed the form after setting it up
- Test the form with valid data in the mapped questions
Missing Recipients
- Confirm the mapped Email question received a valid email address
- Verify the submission contained answers for the mapped questions
- Review the configuration for field-mapping errors
Certificate Generation Issues
- Ensure the certificate template is properly configured
- Check that custom properties in the template match the mapped questions
- Verify your email settings are configured for auto-delivery
Field Mapping Problems
- Use the refresh button to reload your forms and fields if the form structure has changed
- Pick the question that actually collects the email address for the Email field
- Make sure custom field names match between your certificate template and the form mapping
Need help? Reach us from our support page.