
Eventbrite Integration Guide
Connect your Eventbrite account to CertFusion and issue certificates to your event attendees in a few clicks. This guide walks you through connecting the integration, importing attendees from an event, and sending out certificates.
1. How to Connect Your Eventbrite Account
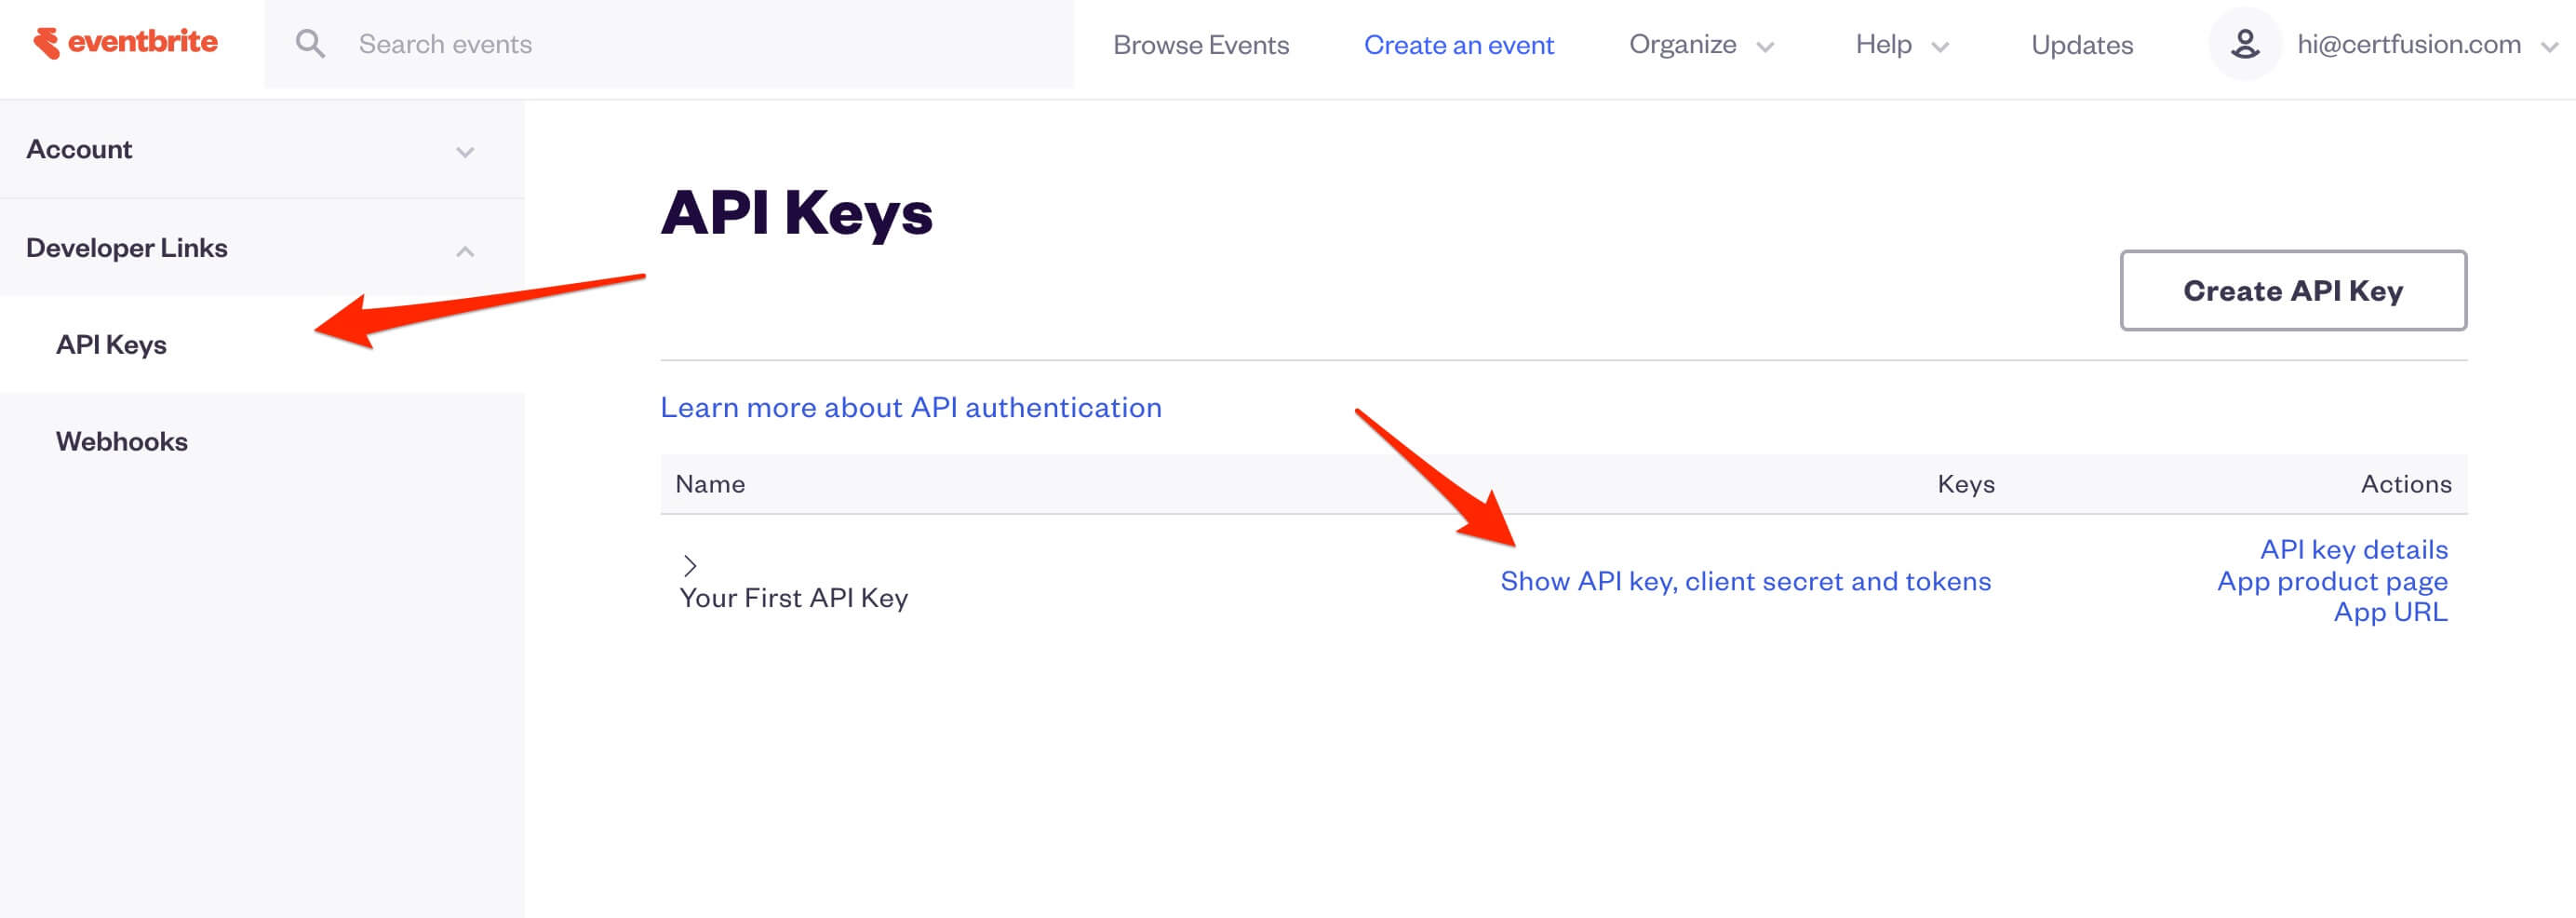
- In Eventbrite, go to Account Settings → Developer Links → API Keys. Use the account that organizes your events.
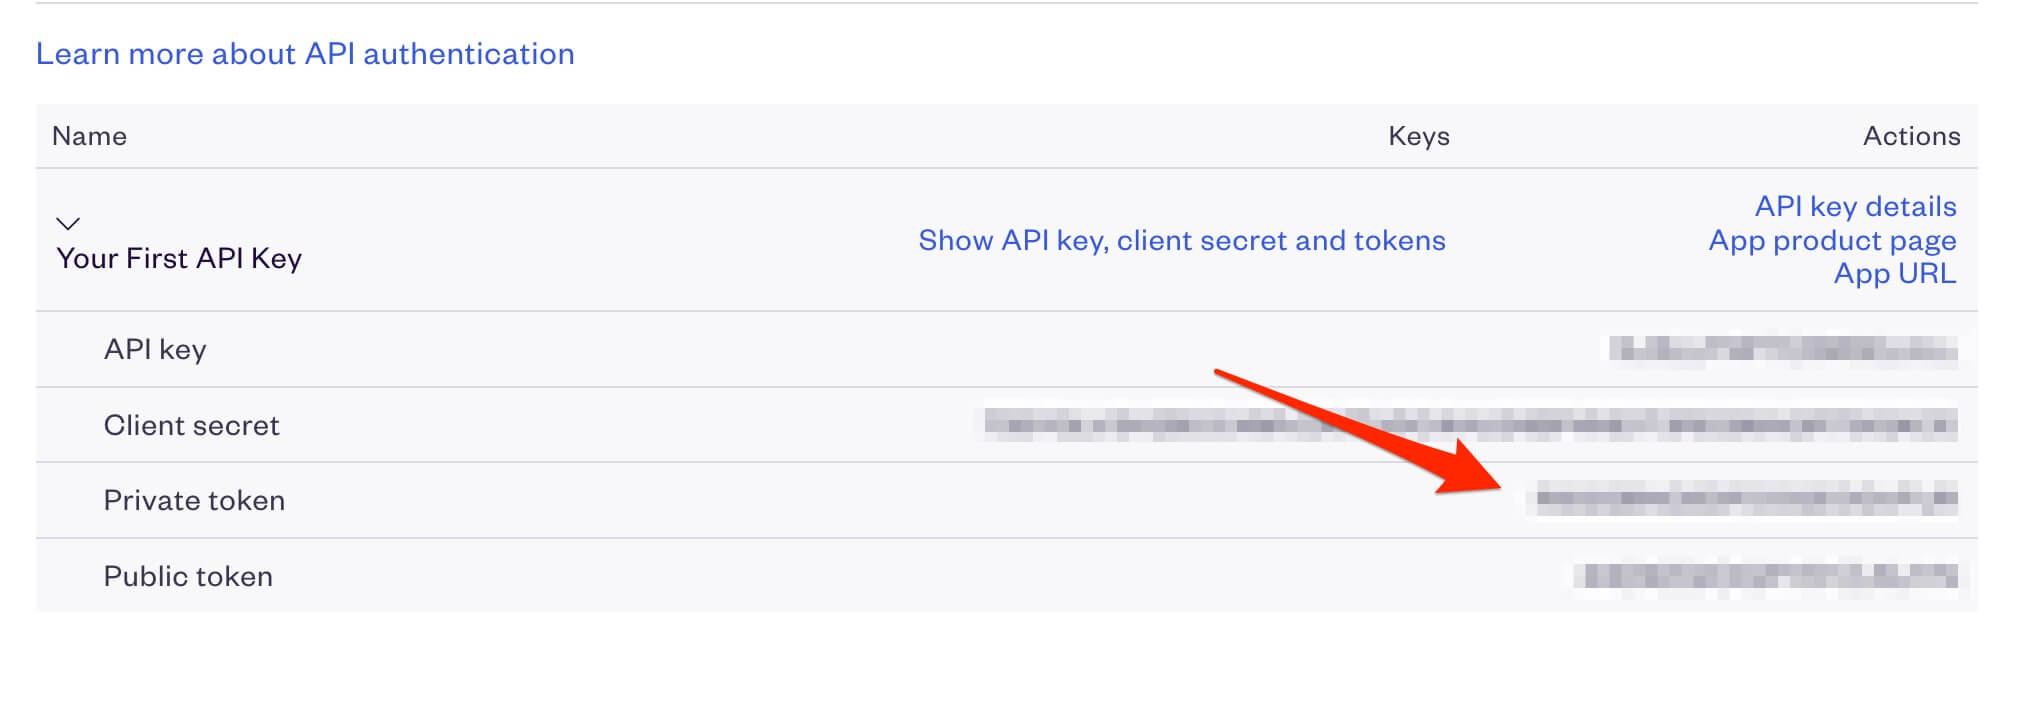
- Click Show API key, client secret and tokens and copy your private token — not the API key or public token.
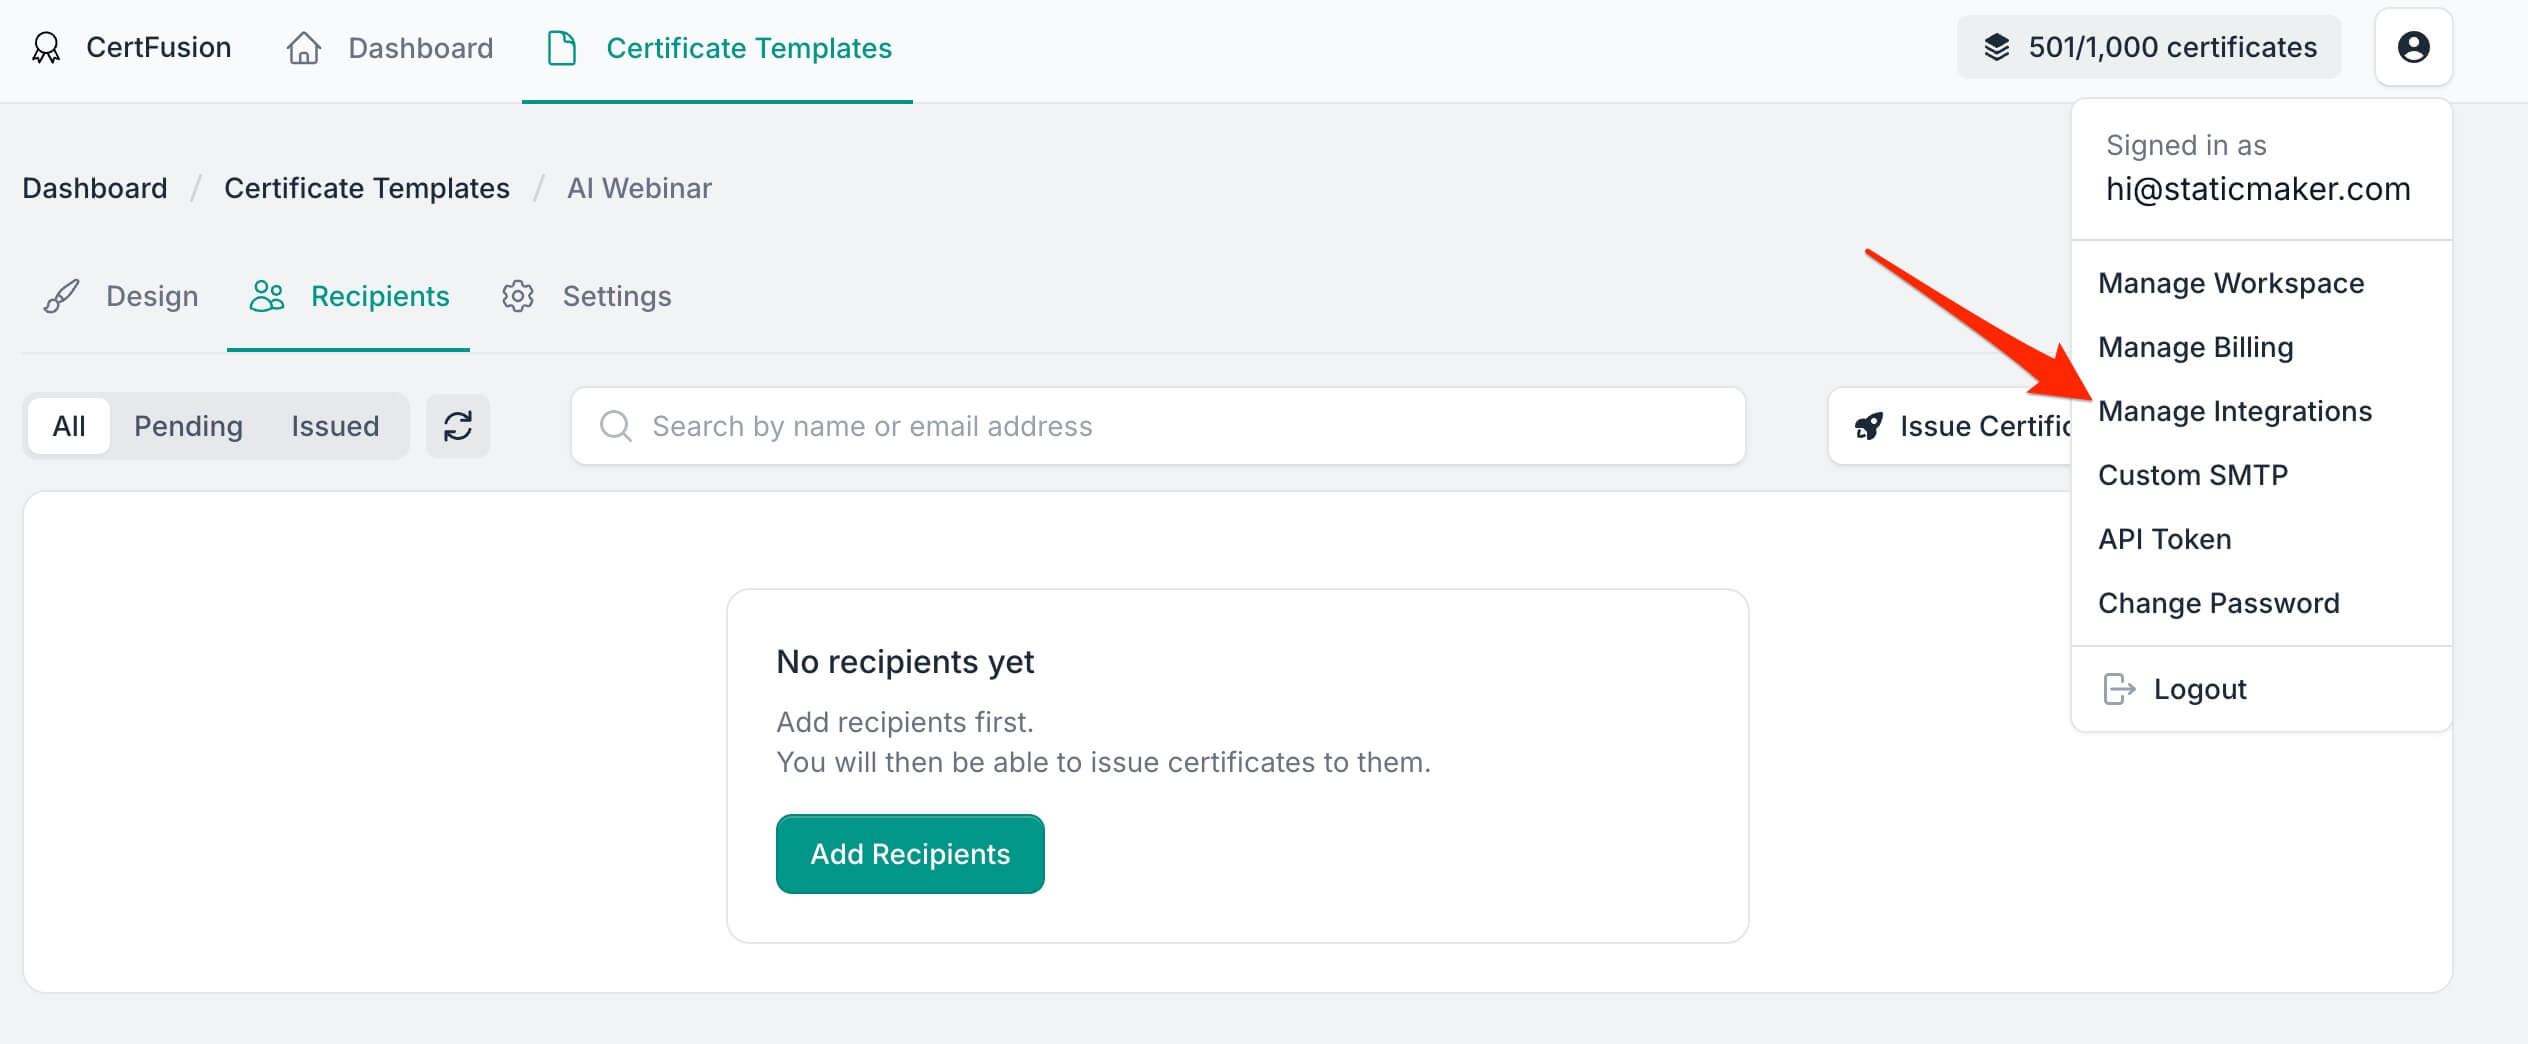
- Navigate to the Manage Integrations page in your CertFusion dashboard.
- Click Connect next to Eventbrite in the integrations list.
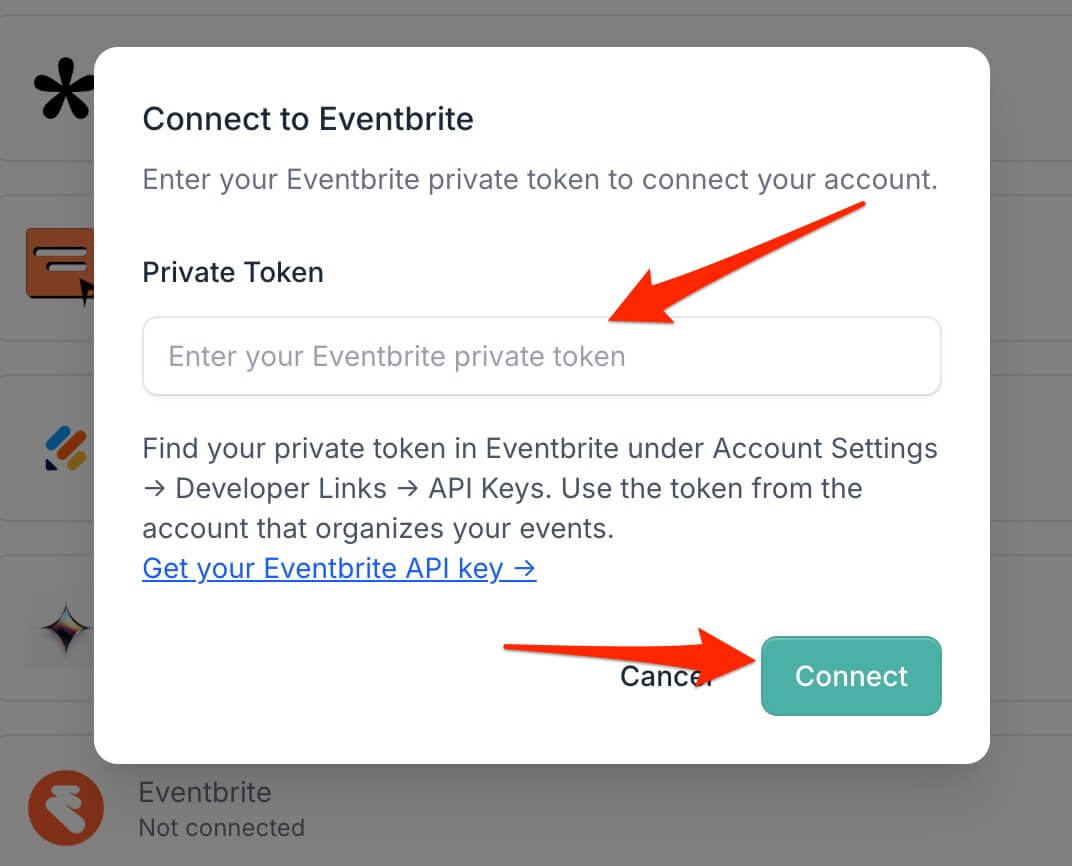
- Paste your private token into the modal that appears and click Connect. CertFusion verifies it against Eventbrite and shows a success message once connected.

CertFusion only accesses the event and attendee data required for certificate generation. Your private token is securely encrypted and stored.
2. How to Import Event Attendees
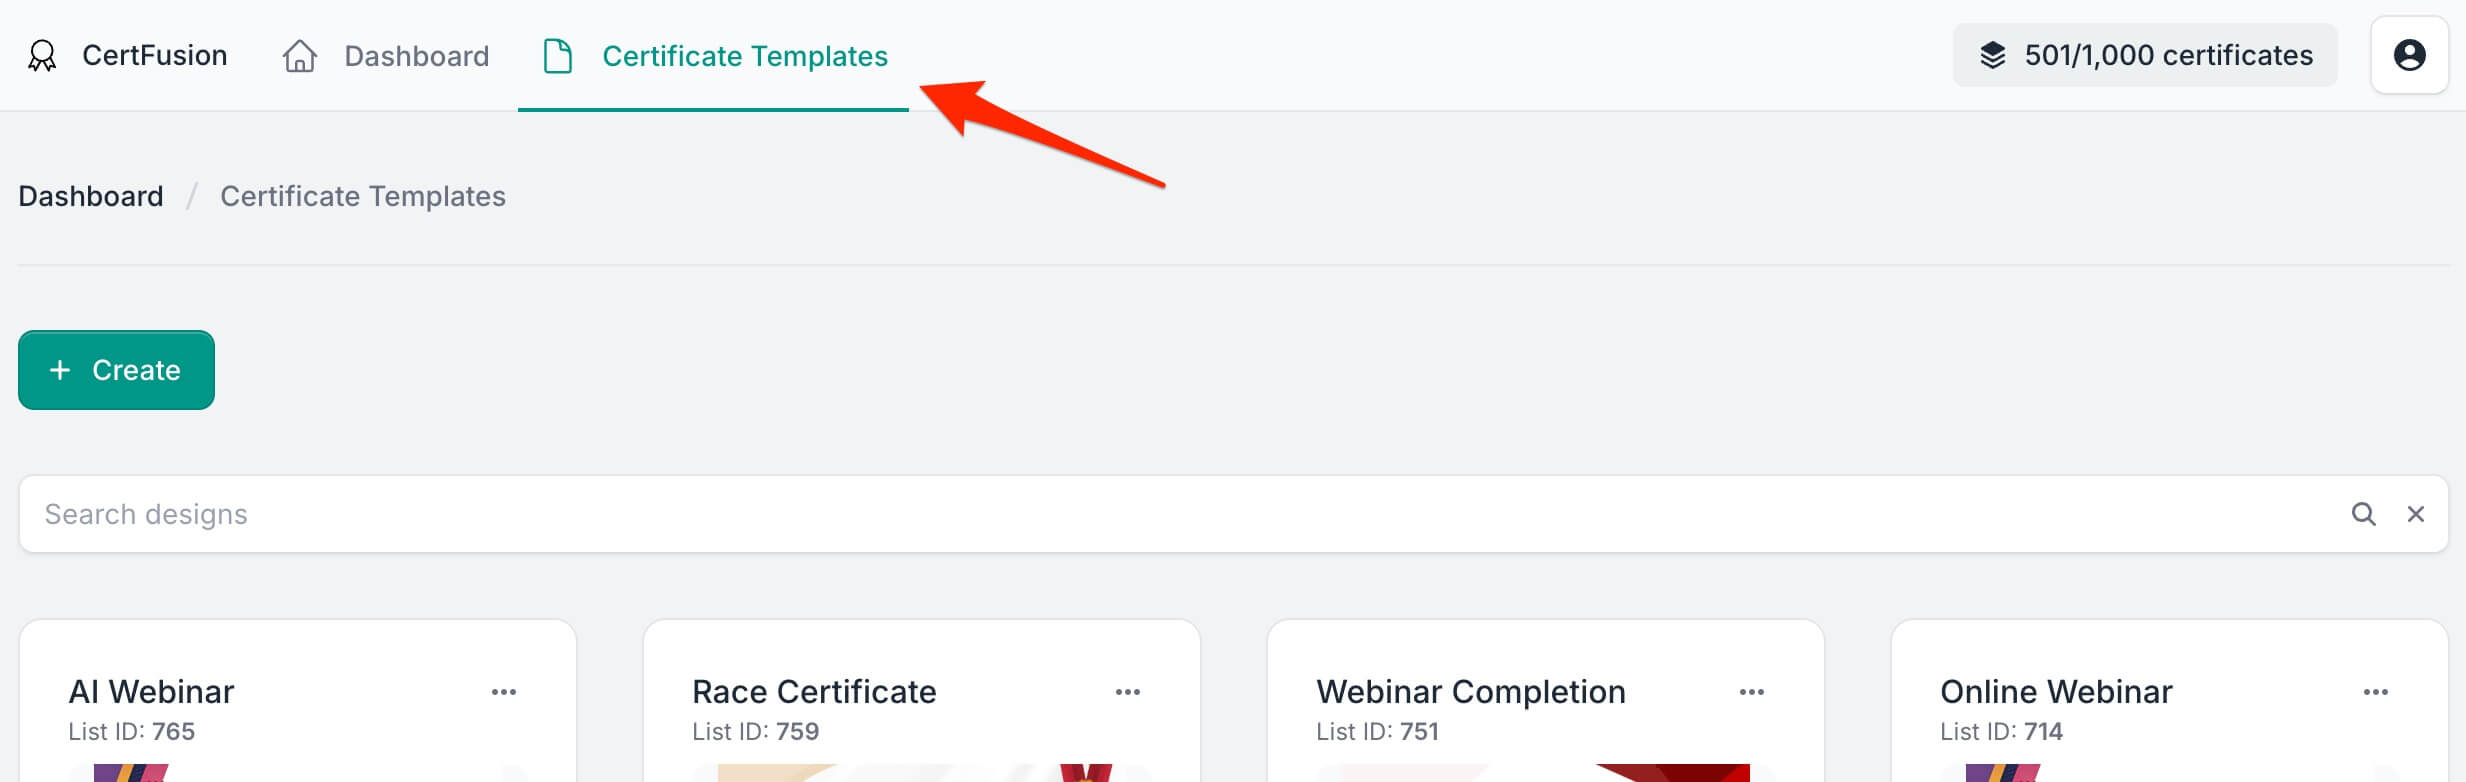
- Go to your Certificate Templates dashboard on CertFusion.
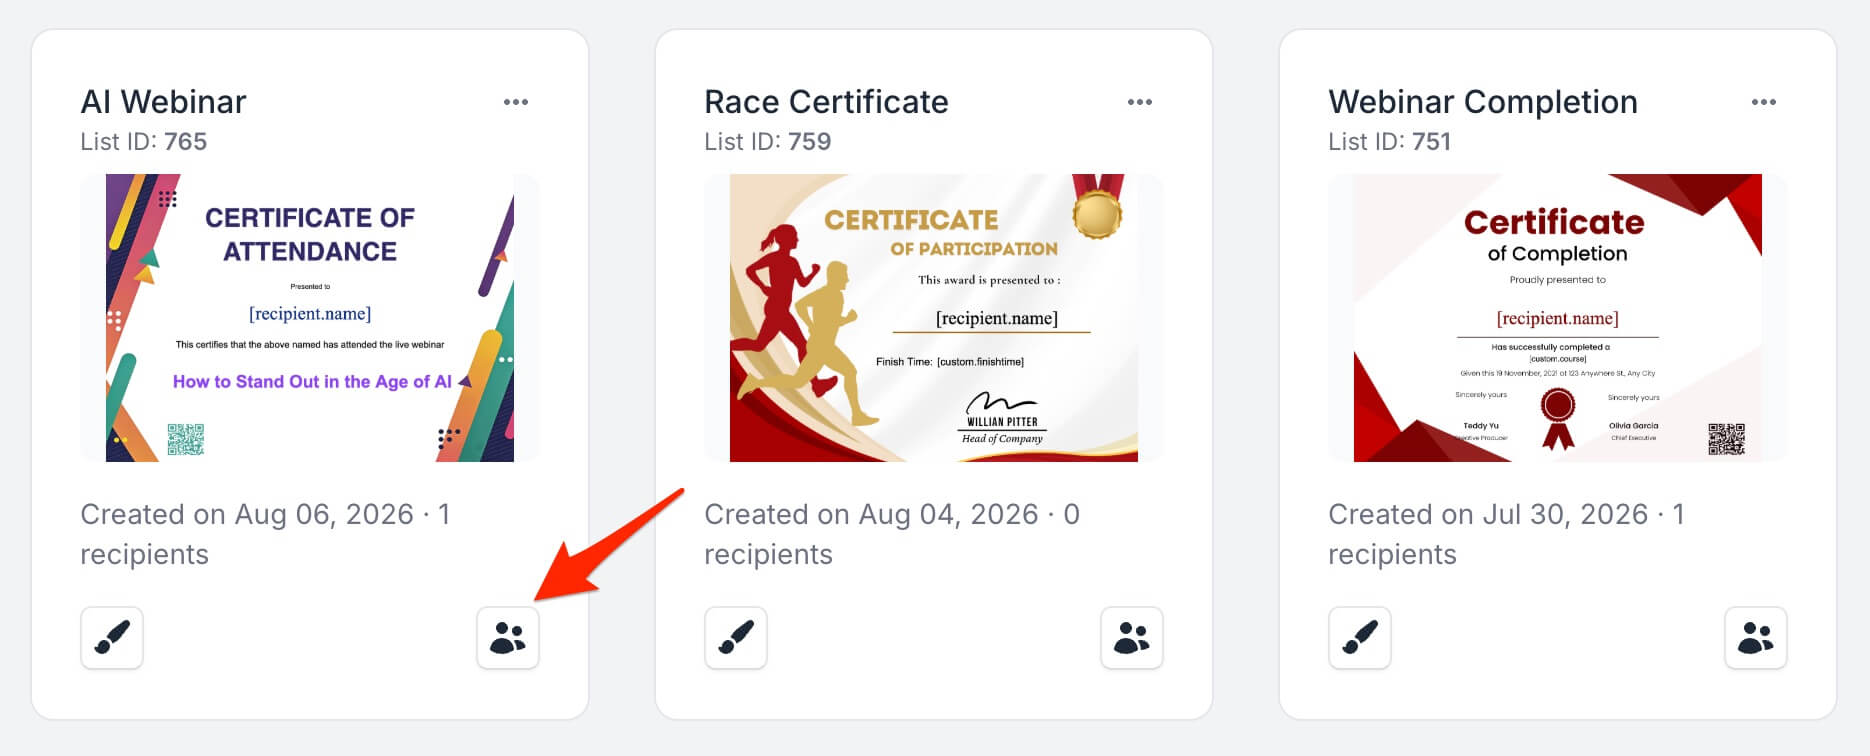
- Open the Recipients section of the template you want to use for your event.
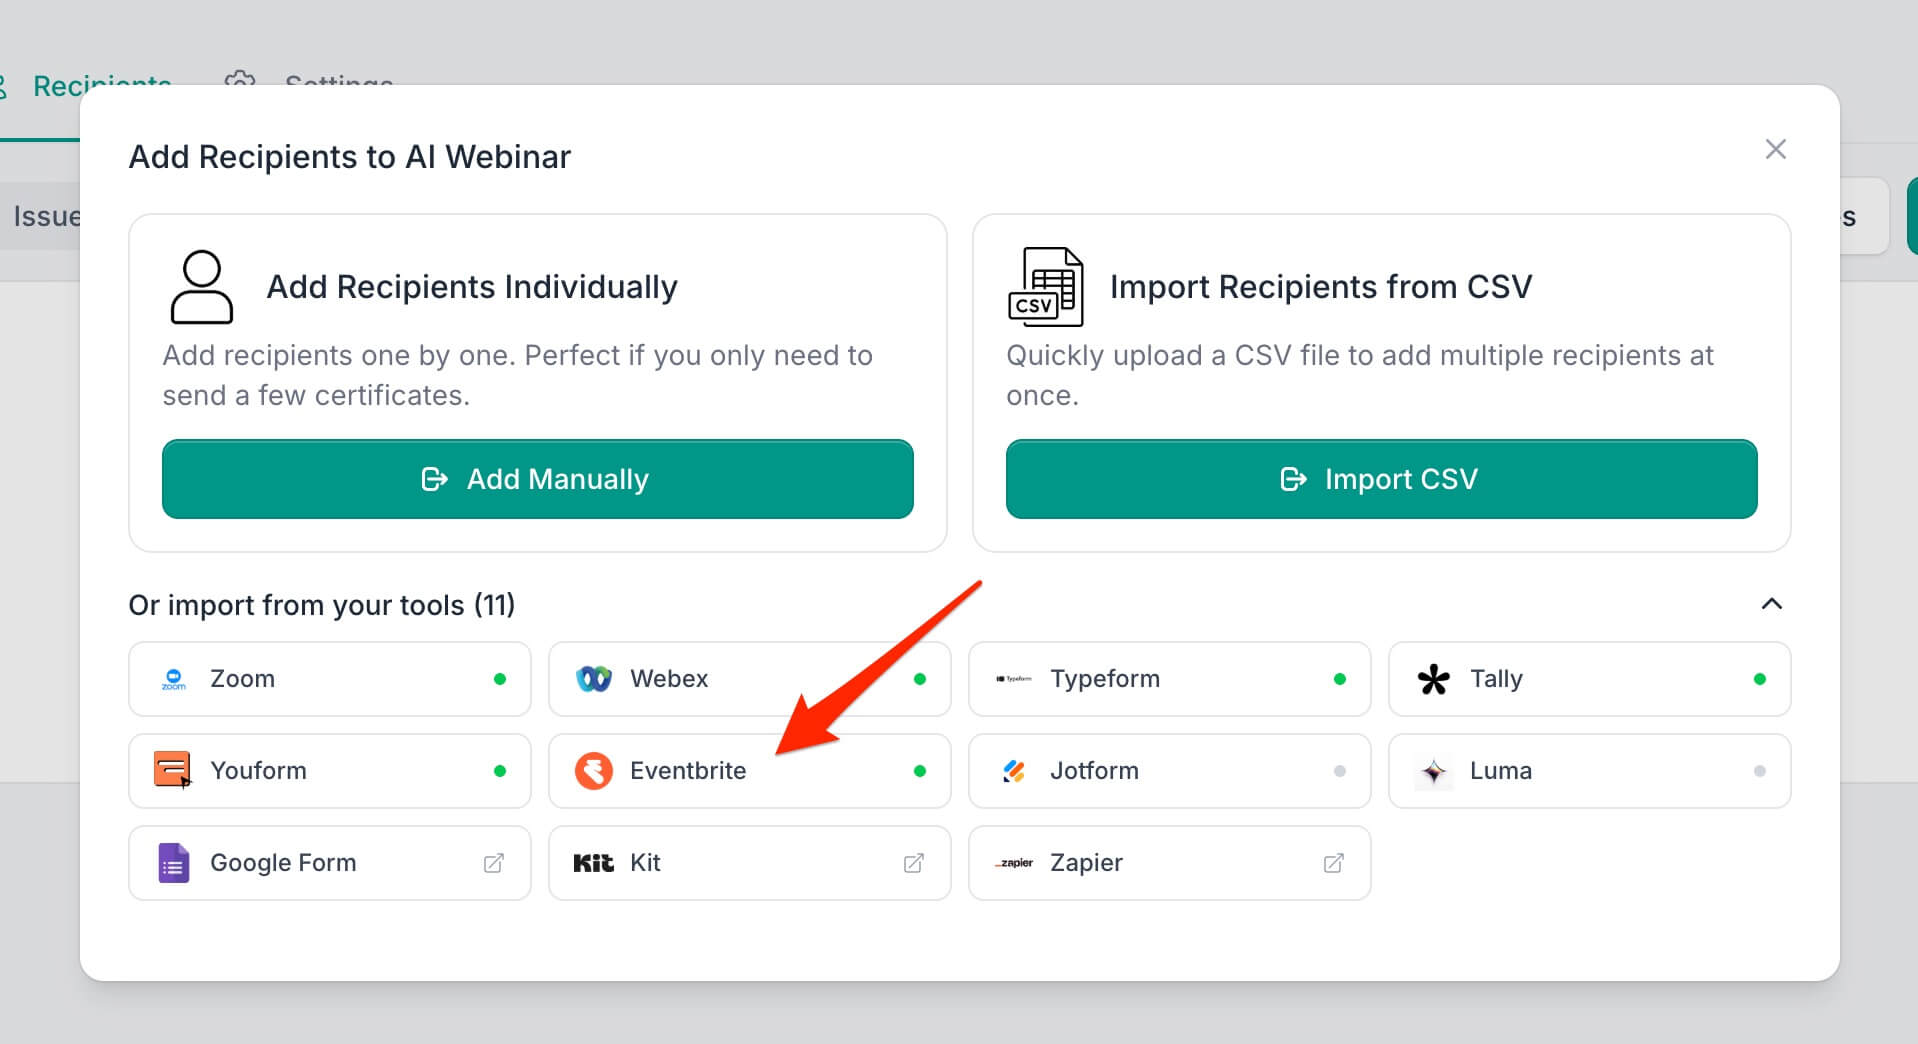
- Click Add Recipients and select import from your tools, then choose Eventbrite.
- If your account belongs to more than one Eventbrite organization, pick the organization that hosts your event — with a single organization this step is skipped automatically.
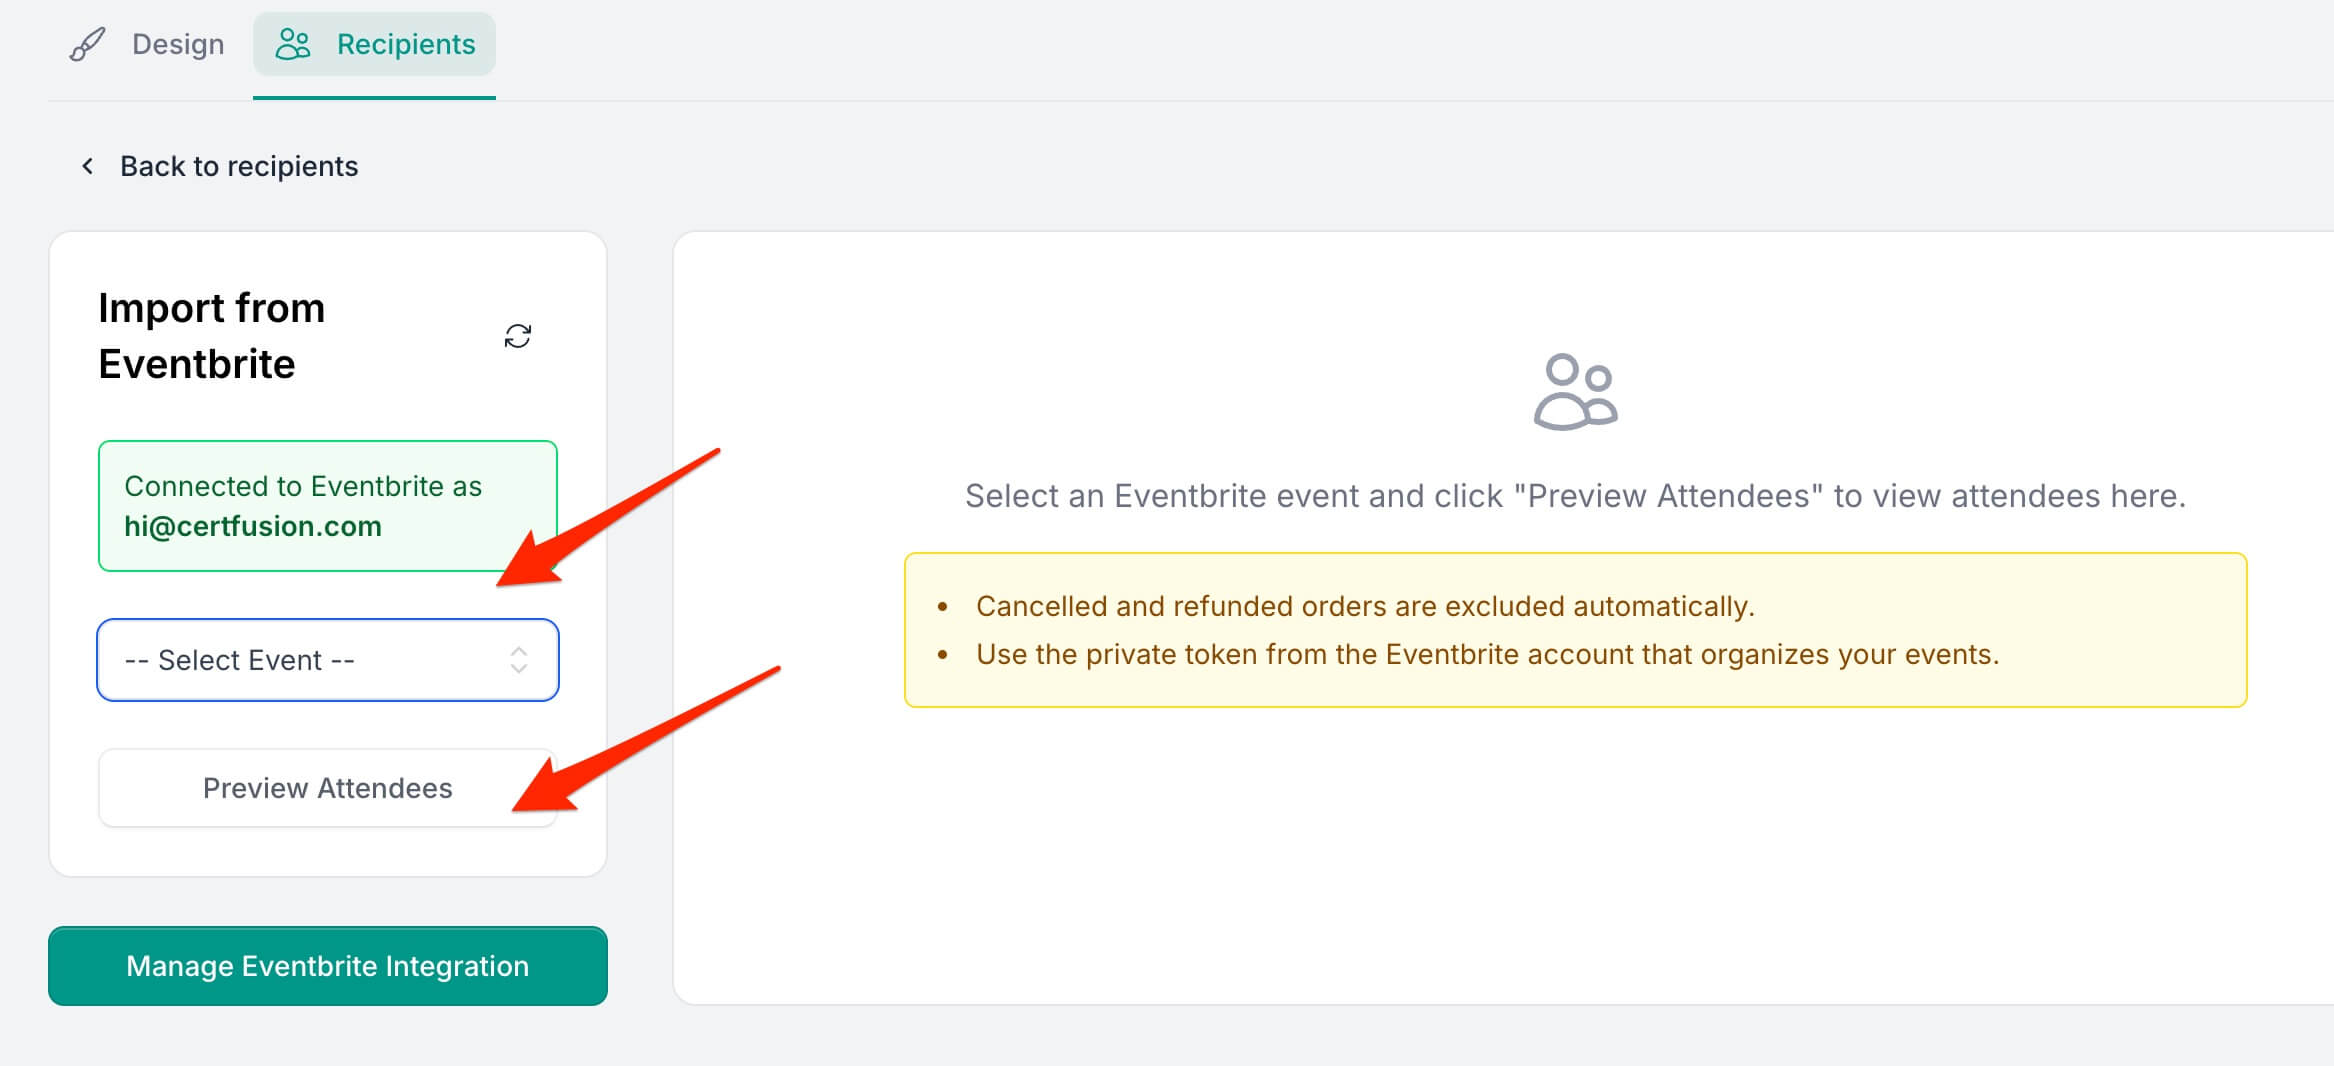
- Select the event you want to import attendees from and click Preview Attendees.
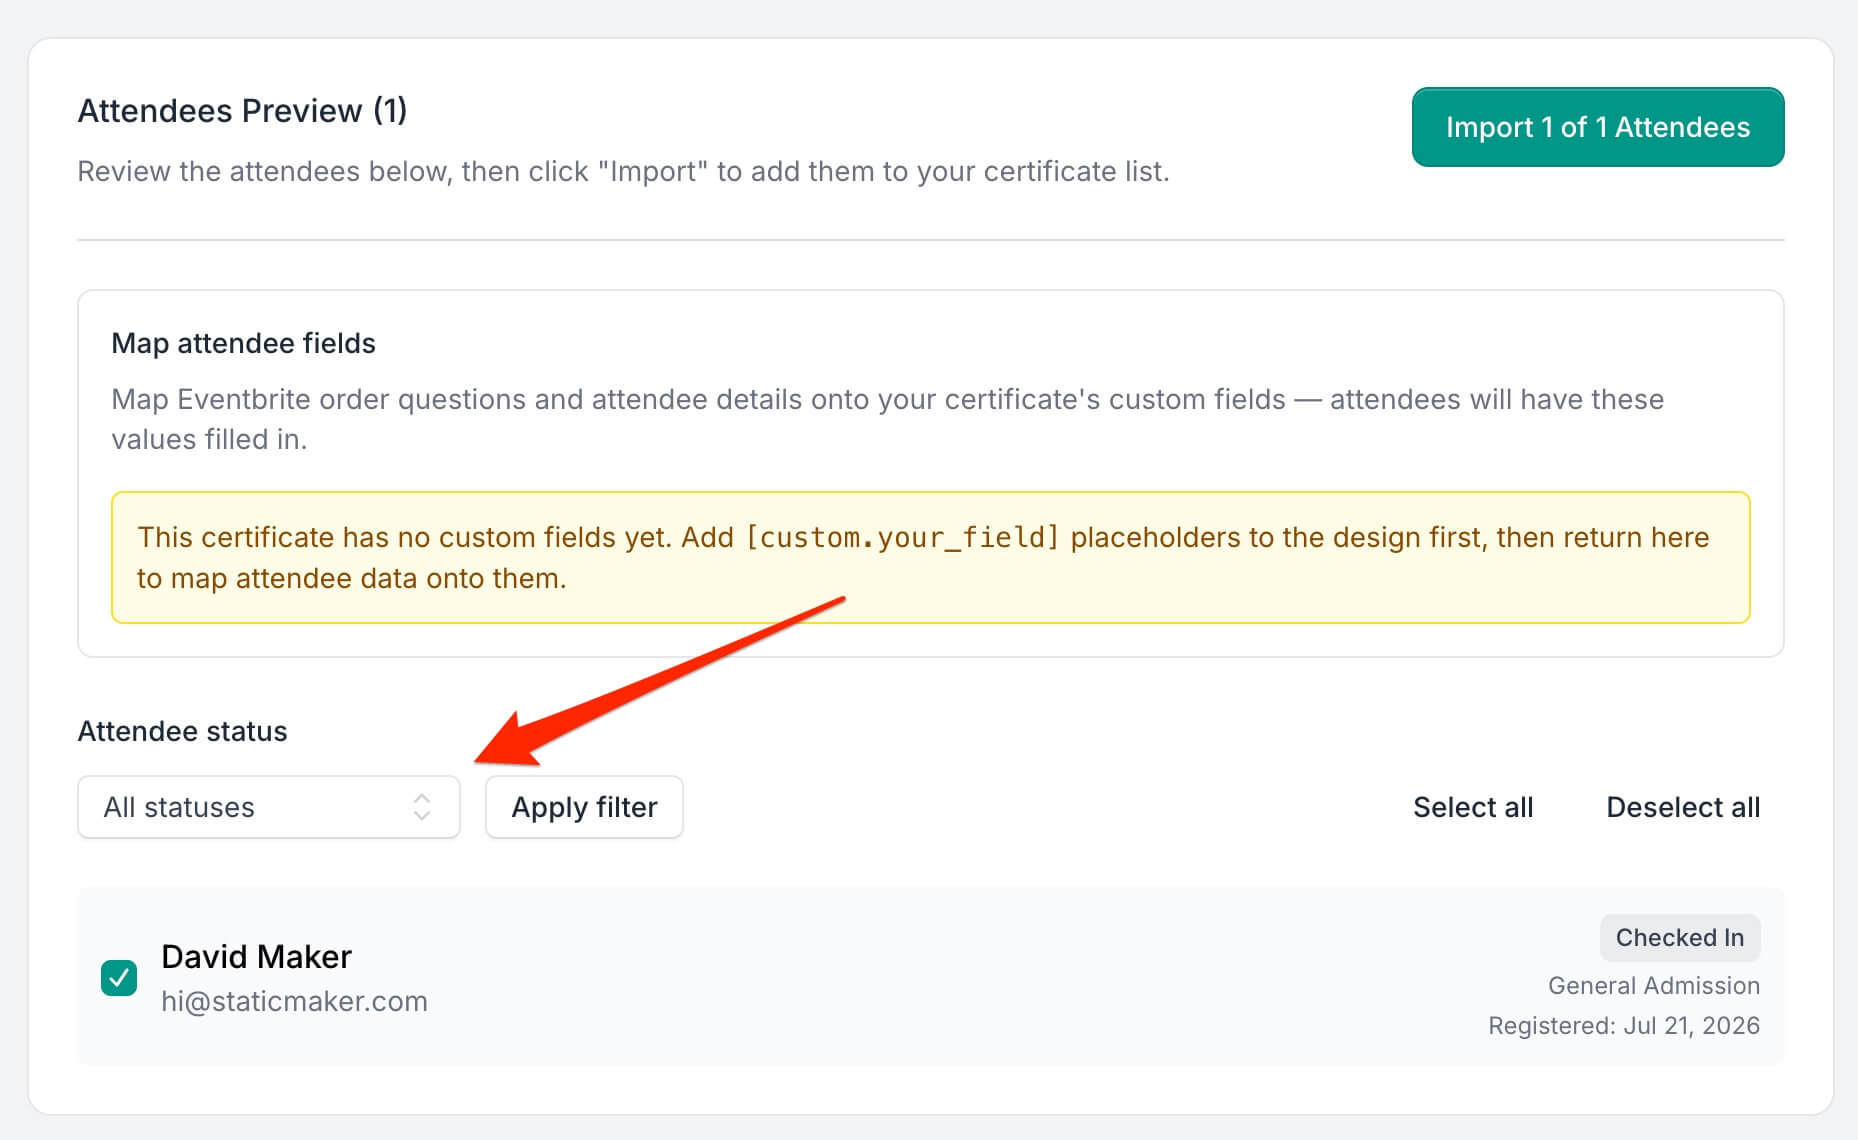
- Review the attendee list. Each attendee shows their name, email, status, ticket type, and registration date. Cancelled and refunded orders are excluded automatically. Use the filter to select attendees by status, or check and uncheck attendees individually.
- If your order form collects extra details, map them onto your certificate's custom fields
using the dropdowns — for example, map a "Company" question to a
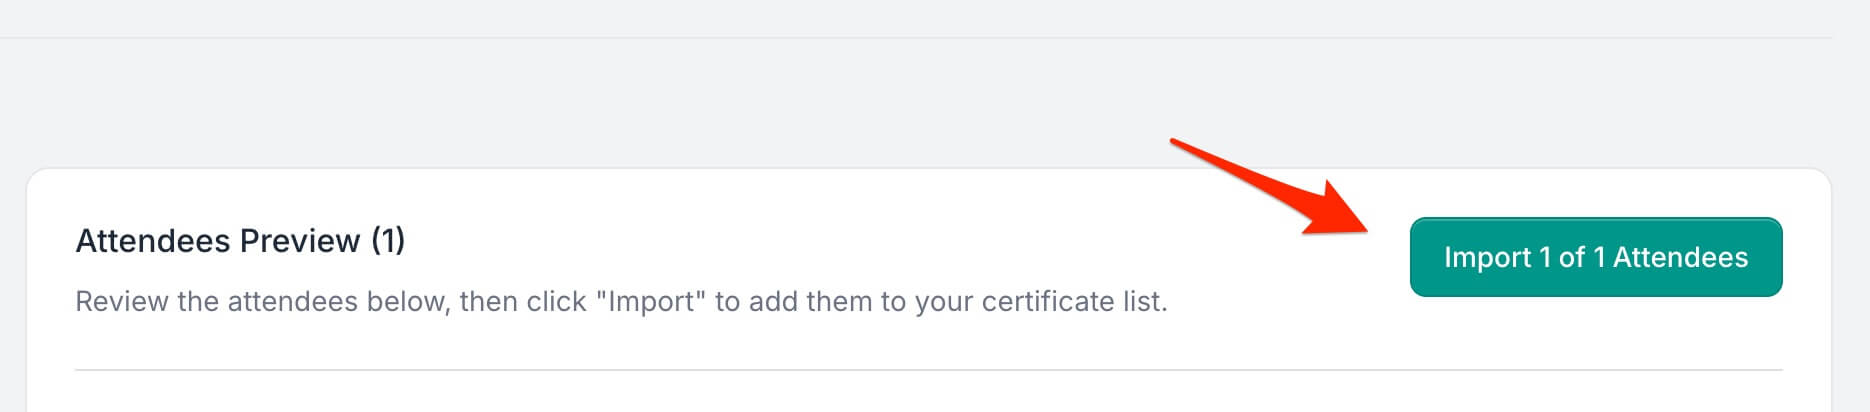
[custom.company]placeholder on your design. Attendee details like phone number, job title, ticket type, and check-in status can be mapped too. - Click Import and confirm. The selected attendees are added to your certificate list as draft recipients.
Attendees are de-duplicated by email address, so you can safely re-import an event after new orders come in — only new attendees are added.
3. Issuing Certificates to Attendees
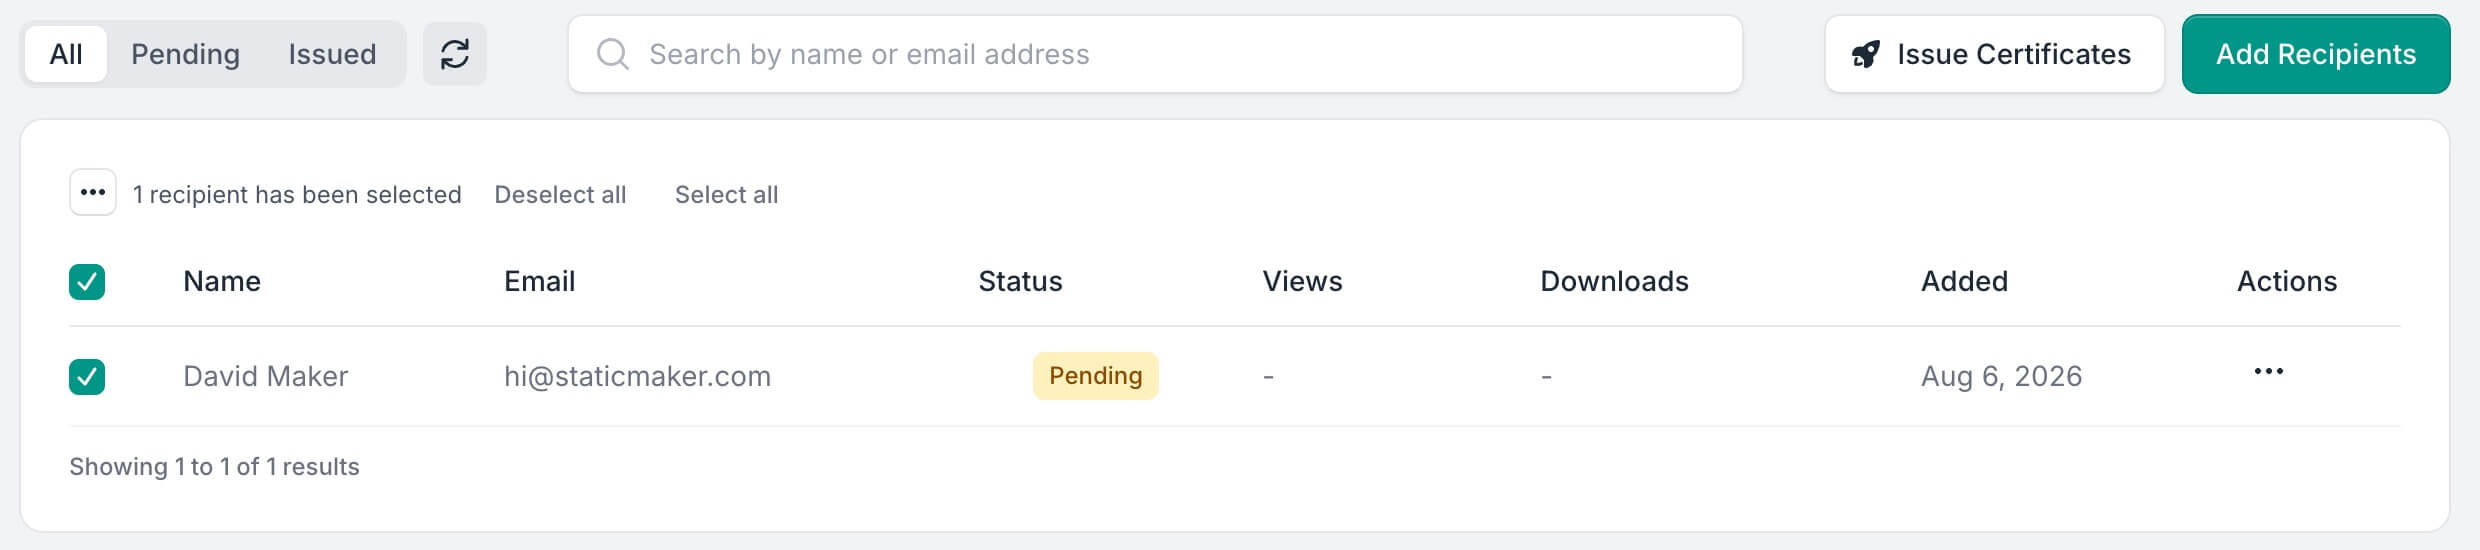
- After importing, you'll land on the Recipients page with your attendees listed as drafts.
- Review the recipients and their custom field values.
- Issue certificates individually, or use the bulk actions to issue to everyone at once. Certificates are generated and emailed automatically.
4. How to Disconnect Your Eventbrite Account
- In CertFusion, go to Manage Integrations and click the Disconnect button next to Eventbrite. This immediately removes your stored private token.
- You can also regenerate the token in Eventbrite's developer settings if needed, which invalidates the old one.

Disconnecting stops CertFusion from accessing your Eventbrite data, but existing recipients and certificates remain intact. You can reconnect at any time by following the connection steps above.
5. Troubleshooting
Connection Issues
- Verify your private token is correct and was copied in full from Eventbrite's API Keys page
- Make sure you copied the private token, not the public token or the API key itself
- Use the token from the Eventbrite account that organizes your events
Events Not Showing
- Use the refresh button to reload your events if you created an event recently
- If your account has multiple organizations, check that you selected the organization that hosts the event
Missing Attendees
- Attendees without an email address are skipped during import
- Cancelled and refunded orders are excluded automatically
- Duplicate email addresses are only imported once
- Re-run the import after new orders — only new attendees are added
Field Mapping Problems
- Order questions only appear if at least one attendee has answered them
- Make sure custom field names match between your certificate template and the mapping
- Add
[custom.your_field]placeholders to your design first, then return to the import page to map attendee data onto them
Need help? Reach us from our support page.